Blog

  • Mother’s Day Flower Craft Ideas That Look Handmade But Polished

    Mother’s Day Flower Craft Ideas That Look Handmade But Polished

    Last updated: October 31, 2026

    Quick Answer: The best Mother’s Day flower craft ideas that look handmade but polished usually use one main material, one simple shape, and one clean finish; in practice, that means a single bloom, a small cluster, or a card-and-flower combo that can be completed in about 10 to 20 minutes once the pieces are cut. Mother’s Day flower craft ideas that look handmade but polished work best when the details are controlled, not crowded.

    Mother’s Day flower crafts can look handmade and still feel gift-worthy if you choose one strong material, keep the shape simple, and finish the presentation like a real present. In this guide to Mother’s Day Flower Craft Ideas That Look Handmade But Polished, the trick is not adding more detail; it is trimming the rough edges so the flowers read as intentional, not school-project random.

    Key Takeaways

    • Pick one main material, such as crepe paper or felt, and let it do the work instead of mixing three or four textures.
    • Clean edges matter more than tiny decorative extras when the goal is a polished look.
    • A plain vase, a folded cardstock card, or a wrapped bundle can make a simple flower craft feel finished.
    • Pipe cleaners are best for stems and structure, not as the main visual feature.
    • The easiest wins are single blooms, mini bunches, and card-and-bouquet combos that stay flat enough to display easily.

    Which Mother’s Day flower crafts look handmade but polished?
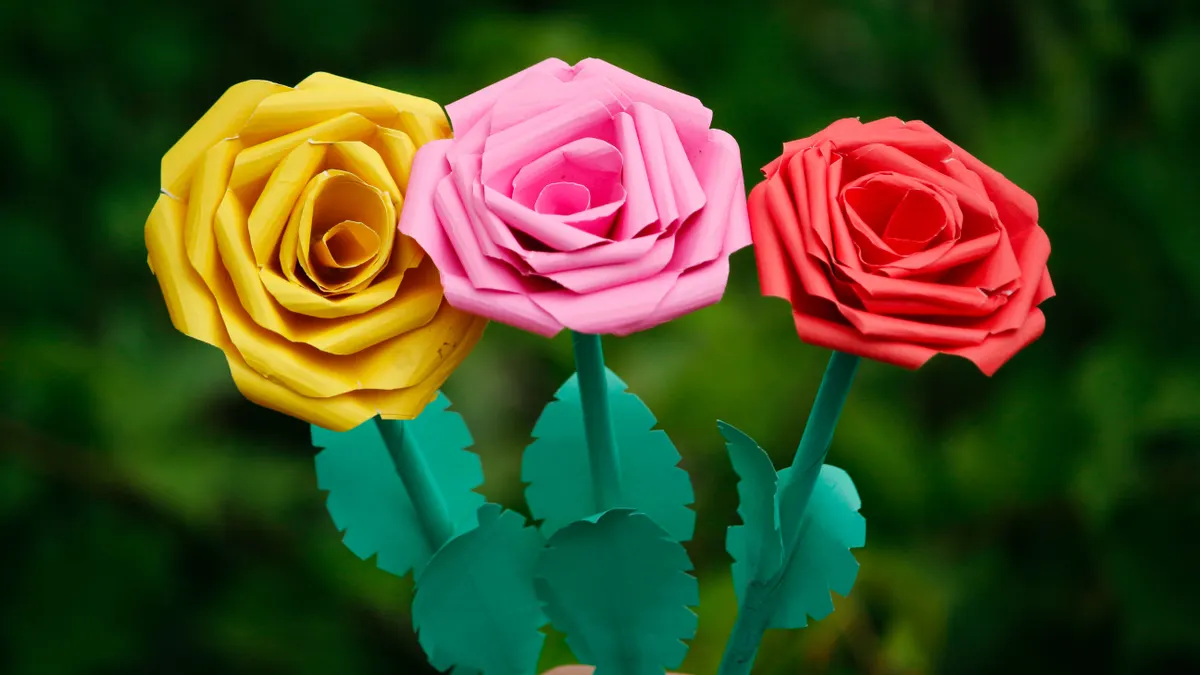
    Three handmade paper roses on stems

    The most polished Mother’s Day flower crafts are crepe paper blooms, felt flowers, and simple pipe-cleaner stems arranged in a vase or tied to a cardstock card. Those formats stay readable from a distance and still have the soft, hand-finished look people expect from a gift made at home.

    For example, a single bloom or a trio of stems usually looks more intentional than a crowded arrangement. That said, the exact result depends on the paper weight, the cutting accuracy, and the final display, so if you are unsure about a material or finish, consult a florist, crafter, or other professional source before relying on a specific technique.

    I would start here if the goal is “cute, not crafty-looking.” A full paper flower bouquet can drift into overloaded territory fast, which is why this page does not try to compete with a bouquet-only project. Instead, think in terms of one bloom, a small cluster of three, or a card-and-flower combo that can stand on its own. That is the sweet spot for gift presentation.

    The materials matter because they signal the finish level. Crepe paper gives you soft folds and a natural petal edge. Felt gives you a dense, tidy look with very little fraying if you cut it well. Pipe cleaners are useful because they hold shape without demanding a heavy stem wrap. Cardstock works for the backing, tag, or flower base, and a simple vase changes the whole read of the craft from classroom exercise to table-ready gift.

    This is not the right route if you want a hyper-realistic botanical replica or a big arrangement with dozens of stems. It also is not the fastest choice if you need a project that can be assembled in 10 minutes with no cutting at all. The polished effect comes from a few careful steps, not from speed.

    How do you make flower crafts for Mother’s Day?

    You make flower crafts for Mother’s Day by choosing one flower shape, cutting it consistently, assembling it on a firm stem or base, and finishing the presentation with a vase, card, or wrap. That sequence keeps the project tidy and helps prevent the loose, uneven look that can make many homemade flowers feel unfinished; if you want a higher-confidence approach, consult a craft or design professional and compare the steps with a trusted how-to source such as Martha Stewart (https://www.marthastewart.com) or HGTV (https://www.hgtv.com).

    Use this core procedure for most of the ideas in this article:

    1. Choose one flower style and one main material. For example, pick crepe paper roses, felt daisies, or cardstock tulips, then commit to that one look for the whole project. A single style looks more deliberate than a mix-and-match bundle.
    2. Cut the petals from a repeatable template. Make one petal shape from scrap paper first, then trace it 4 to 8 times. Repeated shapes create symmetry, which is what gives the flower a polished finish.
    3. Build the center before you add petals. Twist a small ball of tissue, wrap a strip of felt, or form a tight crepe-paper core about 1 inch wide. A neat center keeps the flower from sagging.
    4. Attach petals in overlapping layers. Glue or tape each layer so it covers the stem joint and part of the petal below it. Overlap is what hides the handmade assembly lines.
    5. Add a stem that matches the material. Use a pipe cleaner for a light flower, or wrap the stem with green floral tape if you want it to look more finished. A bare wire or a messy twist can make the craft read less complete.
    6. Finish with one clean presentation choice. Put the flower in a small vase, tie it to a card, or bundle it in kraft paper. The final presentation should take less than 5 minutes and make the craft feel complete.

    A good rule: if the flower looks good in a plain glass vase, it is probably polished enough. If it only looks good after you add glitter, ribbons, and three extra embellishments, the base design is weak.

    Crepe paper flowers that look gift-worthy, not fussy
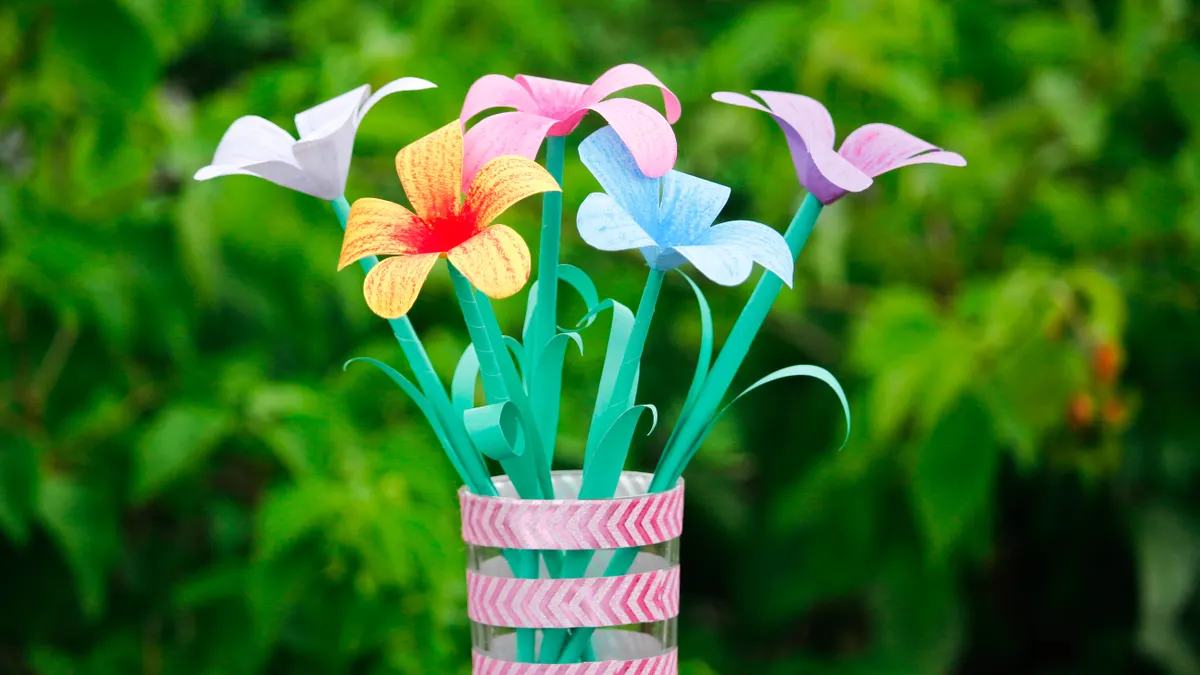
    Paper flower bouquet in a wrapped vase

    Crepe paper flowers look the most polished when the petal edges are slightly varied, the center is tight, and the color palette stays to one or two shades. Crepe paper naturally gives you movement, so the craft does not need a lot of extra decoration to feel finished.

    For a fuller bloom, a rose, peony, or ranunculus-style flower made from 6 to 10 petals is a reliable starting point. That number is enough to suggest fullness without turning the flower into a bulky wad. If you are making several blooms, keep them in the same color family: blush and cream, coral and peach, or pink with one green accent leaf. Mixing every bright color at once usually makes the arrangement read younger than intended.

    Use a 1-inch or 1.5-inch stem core if you are wrapping the stem by hand. A skewer, floral wire, or pipe cleaner works as the armature, but the visible stem should be covered neatly. For a more realistic look, pinch the base of each petal before attaching it so the flower cups inward instead of lying flat.

    The downside of crepe paper is that it shows rushed glue work. Too much glue makes edges shiny and stiff. Too little glue makes petals drift out of alignment. The fix is to work in small sections and let each layer catch before adding the next. A fine-tip glue bottle or a narrow strip of double-sided tape can help keep the finish clean. According to consumer crafting guidance from sources such as Michaels and Joann, clean adhesive control is one of the simplest ways to improve the final look.

    If the flower is going into a vase, cut the stems to different lengths by about 1 to 2 inches so the arrangement has shape. Identical heights make the craft look stiff.

    Felt flowers for a soft, tidy finish

    Felt flowers look polished because the edges stay clean and the texture is calm, even when the shape is simple. They are the easiest option when you want a project that feels handmade without relying on delicate folds or tiny cut marks.

    A basic felt flower can be built from circles, teardrops, or scalloped petals. Felt is forgiving, but it rewards neat cutting. A sharp pair of scissors matters more here than decorative tools. If the edge is jagged, the flower will look fuzzy in the wrong way. For most petals, use a 2- to 3-inch pattern so the bloom reads clearly in the hand and from across a table.

    I would choose felt for a mom who likes understated gifts. A cluster of felt flowers pinned to cardstock, tied with a ribbon, or placed in a small vase has a clean, modern feel. It also works well if you want a longer-lasting keepsake, because the material does not wilt or curl the way some paper does.

    One trade-off: felt can look flat if the layers are too even. Add depth by stacking petals in a staggered pattern and rolling the center slightly tighter than the outer edges. If you are adding leaves, use one leaf shape at the most. Too many leaf types makes the project look busy.

    For a polished result, keep the color story restrained. Cream, dusty pink, sage, and soft yellow all read as intentional. Bright primary colors can still work, but they need a very simple shape to stay elegant. Felt is not the right choice if you want a very airy, translucent flower. It also takes more cutting time than some paper options, so it is better for a small batch than for a huge display.

    Pipe cleaners, cardstock, and the simplest card-and-bouquet combos

    Pipe cleaners, cardstock, and a small vase make the easiest flower projects look intentional because each material has a clear job. Pipe cleaners carry the structure, cardstock gives the flat surface, and the vase or card turns the flower into a gift rather than a loose craft piece.

    For a card-and-bouquet combo, start with a folded piece of cardstock in standard card size, then attach one flower or a trio of flowers to the front using glue dots or tape. Keep the bouquet low enough that the card still closes neatly. A card that bulges is harder to hand over and harder to display. If you want the blooms to pop, lift only the petals, not the entire stem assembly.

    Pipe cleaners work best when they are not the star. Twist them into stems, loops for leaves, or small centers, then cover at least part of the wire with paper or felt. Left exposed, they can look crafty in the literal sense rather than polished. For kid-friendly projects, pipe cleaners are still useful because they are forgiving and easy to bend, but an adult version should hide the mechanics wherever possible.

    A small vase changes the whole mood of the piece. Even a plain bud vase or recycled jar looks more finished than a loose stem bundle. If the jar is transparent, keep the stems tidy and the glue lines hidden. If the vase is opaque, you can get away with a less perfect stem wrap.

    Because of that, this is a practical route when time is tight and you still want the craft to feel considered. It is not ideal for a very ornate floral design, and it is not the right approach if the flowers are meant to be the sole décor element on a mantel. The strength of this style is its simplicity.

    Gift presentation tricks that make handmade flowers feel finished

    Gift presentation makes the difference between “nice craft” and “I would actually put this on my table.” A plain vase, one ribbon, and a clean cardstock tag are usually enough to elevate a flower craft without making it look overworked.

    The easiest polish trick is to remove visual clutter. Use one wrapping paper, one ribbon, or one container finish, not all three. Kraft paper gives a calm, handmade look; white cardstock gives a cleaner, more modern read; a glass vase makes the flowers feel more formal. Pick the one that matches the flower style and stop there.

    Scale matters too. A single bloom in a narrow vase can look more thoughtful than a crowded mini arrangement. If you are making multiple flowers, group them in odd numbers: 1, 3, or 5 stems usually looks more natural than 2 or 4. That small choice helps the arrangement feel arranged rather than assembled.

    A useful finishing habit is to trim every visible tail, thread, or tape edge before you wrap the gift. One stray glue string can make the whole piece look rushed. I would also avoid oversized bows unless the rest of the design is very minimal. Big bows can pull the eye away from the flower and make the craft feel like packaging instead of the gift itself.

    If you want the project to stay flat, especially on a card, choose flowers with low relief. If you want the piece to sit on a table, use a vase and slightly taller stems. Matching the presentation to the display surface can help the craft look polished without adding more craft steps.

    Common mistakes that make handmade flowers look cheap

    The biggest mistakes are using too many colors, leaving rough edges visible, and overdecorating the finished piece. Each one makes the craft look busier, and busy is usually the enemy of polished.

    Too many colors cost you cohesion. A flower in red, pink, yellow, and blue can still be cheerful, but it often reads like leftover supplies rather than a gift plan. Stick to one palette of 2 to 3 colors at most. If you want variety, change the flower shapes instead of the color count.

    Rough cutting costs you clean lines. Jagged petals and uneven stems are the quickest way to lose the handmade-but-polished effect. Fix that by using a template, cutting slowly with sharp scissors, and trimming the finished flower once more after assembly if needed.

    Heavy embellishment costs you clarity. Glitter, sequins, oversized stickers, and multiple ribbon types can crowd the flower. If you use any decorative add-on, make it small and singular. One neat bow or one center bead is enough. More than that tends to make the flower look less thoughtful, not more.

    The final mistake is choosing a container that fights the flower. A highly patterned vase can overpower a soft crepe paper bloom. A tiny vase can make a fuller felt flower look cramped. Match the vessel to the scale of the craft: slim for one bloom, medium for a cluster, and plain for anything already detailed.

    If you want a simple benchmark, step back 6 feet and look at the silhouette. If the shape reads cleanly from across a room, the craft is probably polished enough for Mother’s Day.

    For more seasonal project ideas that use similar finishing logic, the hub on Christmas ornament craft ideas for adults can help with clean assembly and display choices.

    What flowers are easy to craft at home?

    The easiest flowers to craft at home are simple daisies, roses, tulips, and layered blooms made from cardstock, felt, or crepe paper. Those shapes use repeated petals and clear centers, so they stay manageable even if you are working with basic supplies like scissors, glue, a vase, and pipe cleaners.

    If you want the fastest option, choose a daisy from cardstock or felt. It only needs a center circle and a ring of petals. Tulips are also simple because the shape is compact and the petal count stays low. Roses take a little more patience, but they look polished with minimal extra decoration if you roll or layer the petals neatly. Crepe paper versions are often the most forgiving because the material hides slight irregularities.

    I would not start with a complex flower that needs dozens of thin petals or very precise curling. Those projects can look impressive in photos, but they are harder to finish cleanly in a home setting. The best beginner-friendly craft is the one that can survive a small mistake without falling apart visually.

    A good rule is to choose flowers with 3 visible parts: a center, petals, and a stem. If the structure gets more complicated than that, the result often takes longer to refine than to make. Keep the first attempt to one bloom on a card or one small vase arrangement. Once that looks right, make a second in the same style instead of switching materials midway through.

    What is a good handmade Mother’s Day craft?

    A good handmade Mother’s Day craft is one that looks deliberate, holds together well, and feels easy to display or keep.

    Drafted with AI; not yet reviewed by a person.
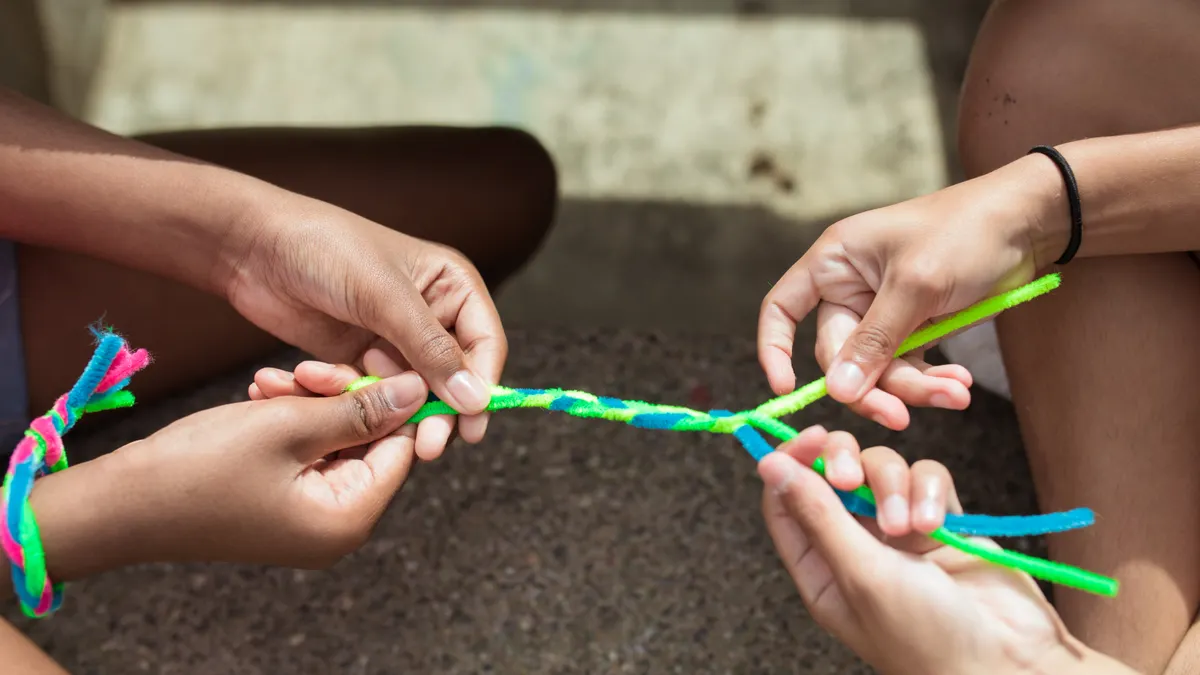
  • How to Make Kids’ Friendship Bracelets with Yarn

    How to Make Kids’ Friendship Bracelets with Yarn

    Last updated: October 31, 2026

    Quick Answer: You can make a kids’ friendship bracelet with yarn in about 5 minutes of setup and one sitting of knotting, using 2 to 4 strands cut to 18 to 24 inches each. In this guide to How to Make Kids’ Friendship Bracelets with Yarn, the simplest versions are a braid or a basic knot row.

    Kids can make a simple friendship bracelet with yarn, tape, scissors, and patience. For How to Make Kids’ Friendship Bracelets with Yarn, the easiest versions use two or three colors, a short cut length, and a basic knot like a braid or a forward knot, so the bracelet feels doable for beginners instead of fussy.

    What you need first to make a yarn friendship bracelet

    Start with soft yarn, scissors, and a piece of tape; embroidery floss works too, and it gives a thinner, neater bracelet. For one child-sized bracelet, gather 2 to 4 strands of yarn in different colors, each about 18 to 24 inches long. That range is enough for a small wrist and still leaves room for knots and tying off at the end.

    Pick yarn that is smooth rather than fuzzy. Thick chenille yarn tangles quickly and makes bulky knots, while very slippery novelty yarn can loosen as the bracelet wears. Acrylic worsted-weight yarn is easy to find and easy for kids to hold. Cotton yarn can work too if the strands are not too bulky. If the goal is a tiny, crisp bracelet, embroidery floss gives cleaner edges than yarn, but yarn is friendlier for younger kids because it is easier to grip.

    You also need a flat surface. A table, clipboard, or even a chair seat works. Tape one end of the strands down so the bracelet does not twist while you work. If you want the finished piece to fit a child’s wrist, measure the wrist first with a scrap of yarn, then add about 2 to 4 inches for tying. That simple habit saves a lot of remaking.

    The one thing I would not choose for this project is very thick roving or bulky craft yarn. It can still make a bracelet, but the result is heavy and lumpy, and small hands have trouble making tight, even knots.

    How do you make a friendship bracelet with yarn?

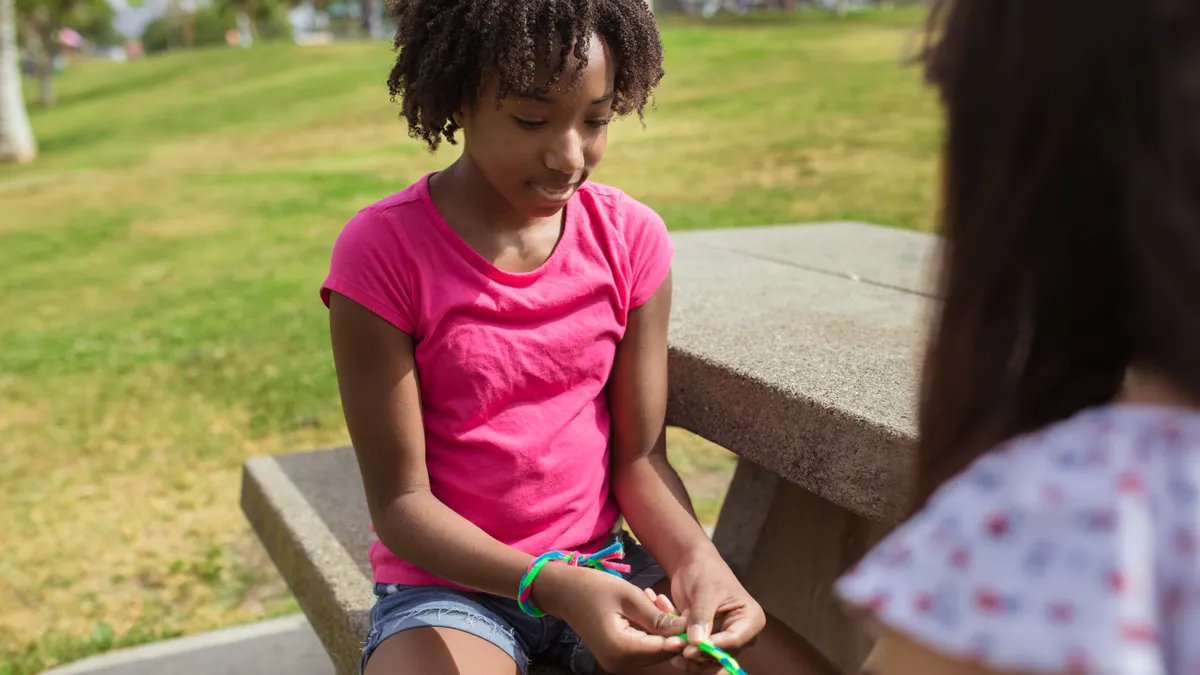
    Girl making a colorful friendship bracelet outdoors

    You make a friendship bracelet with yarn by grouping the strands, securing one end, and repeating a simple knot pattern until the bracelet reaches the right length. The basic setup takes about 5 minutes, and the bracelet itself can be done in one sitting if the child sticks to a plain braid or a two-knot pattern.

    1. Cut and sort the strands. Cut 2 to 4 lengths of yarn, each 18 to 24 inches long, then line up the ends evenly. If the yarn curls badly, stretch each strand gently between your hands before starting. The strands should look neat, not tangled into a nest.

    2. Tie a starter knot at one end. Make one overhand knot about 1 inch from the top, leaving a short tail above it. That knot becomes the anchor for taping. You should see a small loop or nub that holds the strands together.

    3. Tape the top to the table. Stick the knotted end to the table with 2 to 3 inches of tape so the yarn stays still. The lower ends should hang free. When this works, the bracelet stops spinning while the child works the knots.

    4. Choose a simple pattern. For a braid, cross the right strand over the middle, then the left strand over the new middle, repeating until the bracelet is long enough. For a two-strand twist, twist the strands around each other in the same direction, then let them coil naturally. For an easy knot bracelet, use one strand to tie forward knots around the others, then switch sides. The work should look regular, not tight in one place and loose in another.

    5. Keep the tension even. Pull each knot snug, but not so hard that the yarn puckers. If the bracelet looks stiff and rope-like, the knots are too tight; if the strands separate and show gaps, they are too loose. A child usually gets a better result by pulling each knot just until it sits flat.

    6. Check the length against the wrist. Wrap the work around the wrist before the final inch is finished. Stop when the bracelet is about 1 inch shorter than the wrist measurement because the ends will add length. The bracelet should almost meet, but not stretch tight.

    7. Tie off the end. Make a final overhand knot and leave 2 tails for tying. If the bracelet needs to open and close, tie the tails into a small knot and add a sliding tie section with a separate strand of yarn. For most kids, simple tie-on ends are easier and more durable.

    A clean result has even spacing, a bracelet that lies flat, and knots that do not unravel when the tape comes off.

    Which simple knot patterns work best for kids?

    A braid is often the easiest starting pattern for most kids, because it is simple to learn and quick to finish. If the child can braid hair, they can make a yarn friendship bracelet with the same motion, just smaller and slower.

    The three beginner patterns that make sense here are:

    • Three-strand braid. Divide the yarn into three sections and cross the outer strand over the middle, alternating sides. This creates a neat, classic look with almost no counting.
    • Twisted cord. Twist two strands in the same direction, then fold them together so they coil. This works well when the child wants a bracelet in under 10 minutes.
    • Simple knot row. Use one strand to tie the same knot around the others over and over. This gives more texture but takes more attention than a braid.

    The braid can be a good choice if the child is under 8 or gets frustrated by pattern charts. It uses only 3 strands and no special tools. The trade-off is that it looks simpler than a more detailed knot bracelet. That is not a flaw; it is the point. A beginner who finishes a bracelet is more likely to want a second one.

    If the child wants more color changes, use 2 colors in the braid or alternate colors every few knots in the knot row. Keep the pattern short enough to remember without a chart. A simple rule like “right over middle, left over middle” is easier than following a diagram.

    One common mistake is pulling the braid too hard. That compresses the yarn and makes the bracelet narrow and stiff. Another is leaving one strand much longer than the others, which causes the braid to drift and tilt. Trim uneven ends before starting, and the final bracelet will look cleaner with less effort.

    How long should the yarn be for a child-size bracelet?

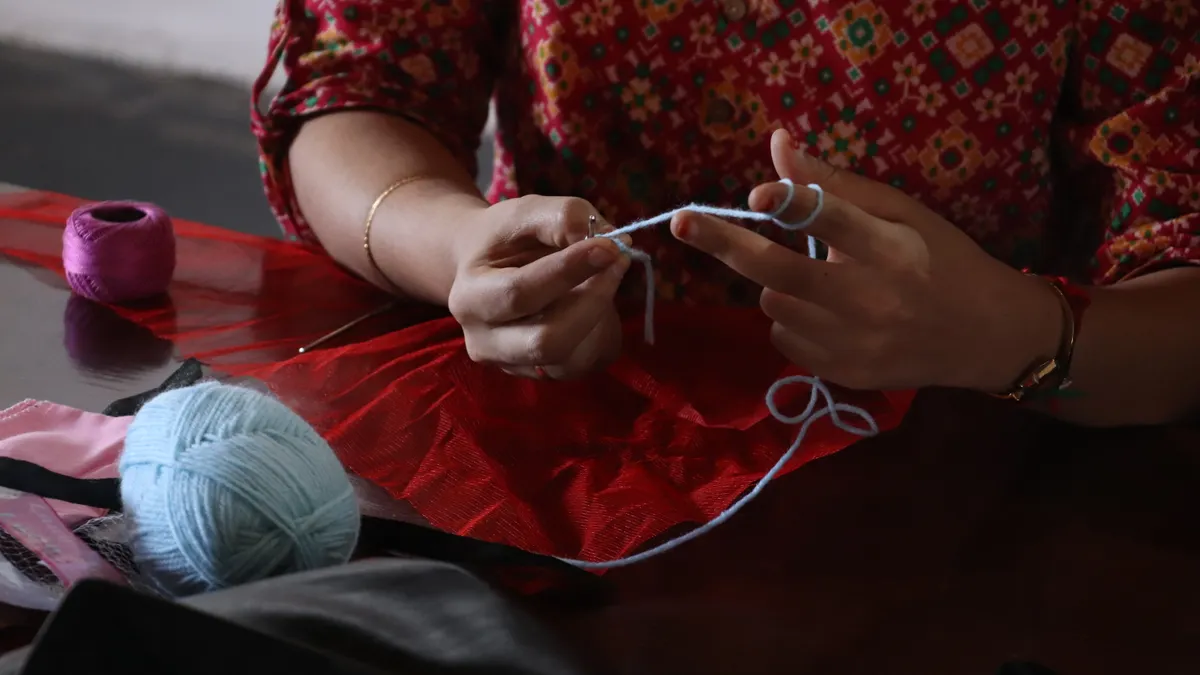
    Hands knotting yarn on a table

    The yarn should usually be 18 to 24 inches per strand for a child-size friendship bracelet, with the longer end of that range better for braids and knot patterns that use up extra length. That is the easiest starting point when you do not have a measured wrist size in front of you.

    A simple way to size it is this: measure the child’s wrist, then cut strands that are about 2 to 4 times that measurement, depending on the pattern. A braid uses less yarn than a knot-heavy design, so it can sit closer to the low end. A pattern with lots of wrapping or repeated knots needs more slack and should go longer. If the yarn is very thick, choose the longer side of the range because bulky strands disappear faster.

    If the bracelet is for a toddler or younger child, cut the strands a little shorter rather than longer. Extra-long yarn gets in the way, tangles around the hands, and makes the bracelet harder to manage on a small table. For older kids, a longer length is fine because the leftover tails are easier to tie.

    A good way to avoid wasting material is to cut one test set first and see how much yarn is left after one bracelet. Then adjust the next set from that result. That beats trying to guess perfectly on the first try.

    A drawback of using yarn instead of embroidery floss is that yarn can be fluffy and “eat” more length. If the yarn is especially textured, the bracelet may finish shorter than expected. In that case, use 2 to 3 extra inches per strand next time. For thin embroidery floss, the opposite is true: it usually goes farther and makes a more precise braid.

    How do you finish a friendship bracelet?

    You finish a friendship bracelet by tying secure knots at both ends, trimming the tails to a tidy length, and checking that the bracelet opens or fits the wrist the way you want. The cleanest finish for a kid-made bracelet is a simple tie-on end with a doubled knot. If a child has allergies, skin sensitivities, or pain concerns, consult a parent, guardian, or pediatric professional before wearing it.

    When the bracelet is long enough, stop the pattern and make one overhand knot close to the final row. Then make a second knot on top of it for security. Leave about 2 inches of tail if the bracelet will be tied on later. That gives enough material to hold without making the ends bulky.

    If the bracelet is meant to slide on and off, finish both ends with small knots and leave a little extra length. Yarn is not as neat as embroidery floss for sliding closures, so keep expectations modest. A yarn bracelet with a simple tie closure is usually more reliable than a complicated adjustable ending.

    Trim the loose tails only after the knot feels firm. Cut them about 1/2 inch to 1 inch from the knot if the bracelet is meant to stay tied, or leave longer tails if it will be tied each time it is worn. If the yarn frays, you can lightly twist the cut ends between your fingers to make them look cleaner.

    The mistake to avoid here is cutting the tails too short. Once the yarn is trimmed flush, there is no easy fix. Another mistake is tying a single knot and calling it done. One knot can loosen on smooth yarn, especially if the bracelet gets pulled on by small hands. Two knots are the safer choice.

    Yarn alternatives when you want a different look

    Embroidery floss is a strong alternative if you want a flatter, more colorful bracelet with finer detail. It is thinner than yarn, so the knots sit closer together and the finished bracelet looks more like the classic friendship bracelet many people picture.

    Cotton crochet thread is another option, especially if you want a lighter bracelet that does not fuzz quickly. It is thinner than most yarns and sturdier than some novelty fibers. The trade-off is that it can be harder for younger kids to grip because it is so slim. For very small hands, regular yarn is still easier.

    Ribbon can be used in place of yarn for a quick project, but it behaves differently. It slides, twists, and shows creases, so it is better for a short craft than for a bracelet that will get a lot of wear. If the goal is a durable, washable kids’ bracelet, yarn or embroidery floss is the better pick.

    A soft craft fiber is a better match than wire, elastic cord, or anything sharp-edged for this project. The point here is a simple craft with tape, scissors, and soft fibers, not a jewelry project that needs special hardware. If a child is younger than 6, soft yarn is also easier to handle because it does not poke or scratch.

    This is also the right place to keep the design simple. There is no need for beads, loom tools, or complicated charts to make a good-looking bracelet. A clean braid in 2 colors often looks better than a messy pattern done with too many materials.

    Mistakes that make yarn bracelets harder than they need to be

    The biggest mistake is choosing yarn that is too thick, because it makes the knots bulky and the bracelet hard to bend. If the bracelet feels like a tiny rope instead of a bracelet, switch to thinner yarn or embroidery floss next time. Another common mistake is making the strands far too long, which leads to tangles on the table and frustration before the first inch is finished.

    Loose tape is another problem. If the bracelet keeps sliding around, every knot becomes uneven. Use a longer strip of tape or tape the top to a clipboard so the work stays still. A fixed starting point makes a bigger difference than most beginners expect.

    Uneven tension can ruin the look even when the pattern is right. Tight knots shrink the bracelet and make it curl; loose knots leave gaps. The fix is simple: after each knot, tug until it lies flat, then stop. There is no prize for pulling harder.

    Mixing too many colors can also make the bracelet harder to follow. For a first try, 2 colors are enough. Three is fine if the child can keep track, but 5 or 6 colors usually turns a quick craft into a cluttered project.

    The final mistake is skipping the wrist check. A bracelet that looks nearly done can still be too short by 1 inch or more. Wrap it around the wrist before the last knot, and the fit problem disappears before it starts. This one step saves more failed bracelets than any other.

    Key Takeaways

    • A kids’ friendship bracelet with yarn is easiest when you start with 2 to 4 strands, tape, and scissors.
    • A braid is often the easiest beginner pattern; it is faster and less confusing than a knot chart.
    • For most child-size bracelets, 18 to 24 inches per strand is a practical starting length.
    • Finish with a secure double knot and leave enough tail for tying or adjusting.
    • Embroidery floss gives a neater result, but yarn is easier for small hands to hold.

    Can you make friendship bracelets with yarn?

    Yes. Yarn works well for simple friendship bracelets, especially braid-based styles and basic knot rows. It is easier for kids to handle than very thin thread, though it makes a bulkier bracelet than embroidery floss. For the cleanest result, choose smooth yarn and keep the pattern simple.

    How long should the string be?

    For a child-size bracelet, start with 18 to 24 inches per strand. The exact length depends on wrist size, yarn thickness, and the knot pattern. Braid patterns use less yarn than knot-heavy ones, so they can stay shorter. When in doubt, cut a little extra and trim the ends later.

    How do you finish a friendship bracelet?

    Finish a friendship bracelet with a secure knot at the end, then leave tails long enough to tie or adjust. A double overhand knot is the simplest reliable finish for yarn. Trim the ends only after the knot is tight, because cutting too close makes the bracelet hard to save if it loosens.

    Drafted with AI; not yet reviewed by a person.
  • How to Make Paper Gift Bags from Wrapping Paper

    How to Make Paper Gift Bags from Wrapping Paper

    Last updated: October 31, 2026

    Key Takeaways

    • Gather wrapping paper, tape, scissors, a ruler, a pencil, a hole punch, ribbon, a cardboard insert, and a few paper clips.
    • Strengthen the bottom with a cardboard insert, extra inside tape, and a centered load.
    • Measure the gift first, then leave room for seams, folds, and the top closure.
    • Choose the top closure based on how the bag will be used and opened.

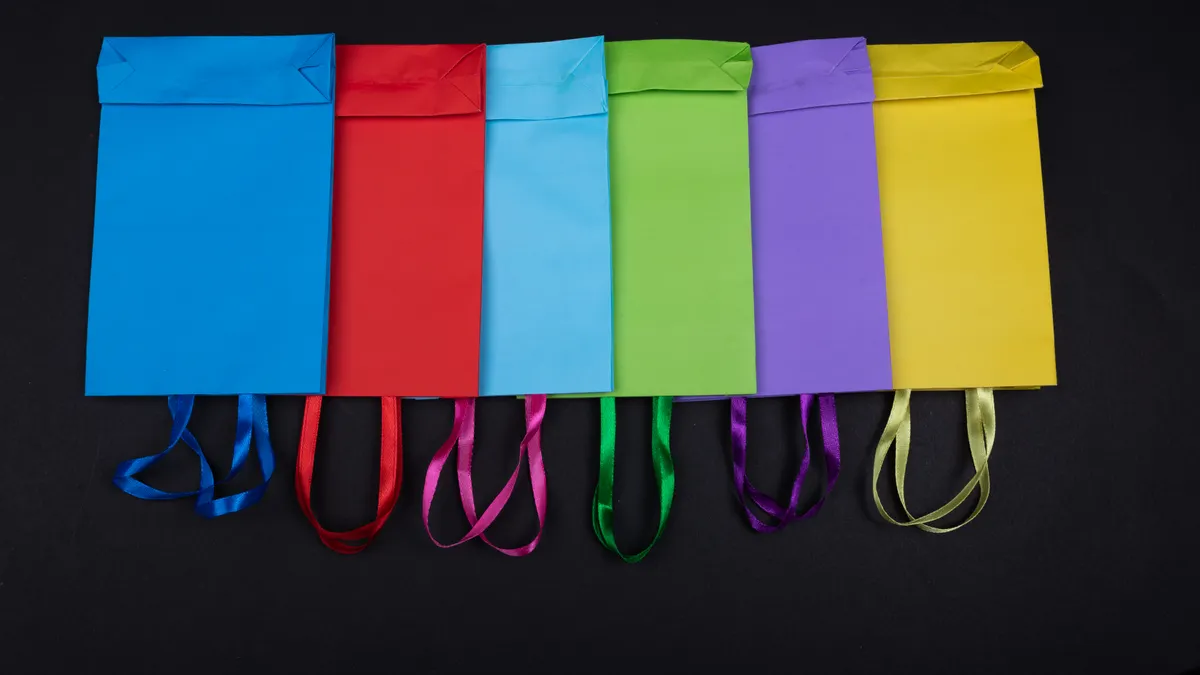
    A paper gift bag is easy to make from wrapping paper when you fold it into a boxy sleeve, set a reinforced bottom, and finish it with handles or a fold-over top. For small gifts, this is faster than buying a bag and gives you a custom size without wasting a full sheet. Quick answer: you can make one in 8 steps using a 24 x 36 inch sheet for many small gifts.

    What you need before you start

    Two plain brown paper gift bags with twisted handles

    You need wrapping paper, tape, scissors, a ruler, a pencil, a hole punch, ribbon, a cardboard insert, and a few paper clips. A clean sheet in the 24 x 36 inch range is enough for many small gifts, though you can scale up or down as long as you keep the proportions.

    Choose wrapping paper with a little body. Thin, tissue-like paper tears at the folds and sags at the bottom. Heavier gift wrap, the kind that holds a crease when you run a nail along it, is much easier to shape. If you want the bag to carry anything with corners or weight, plan on adding a cardboard base.

    Set out one flat work surface, because once the first folds are made the sheet gets harder to manage on a cramped table. Keep tape strips pre-cut if you know you want a neat finish. If you are making more than one bag, use the first bag as a pattern for the rest. For measurements and fold style, the basics in our paper craft techniques guide also help.

    How do you make a gift bag out of wrapping paper?

    You make a gift bag out of wrapping paper by folding the sheet into a tube, closing the bottom like a paper lunch bag, and adding handles or a top fold at the end.

    1. Cut the paper to size. Lay the wrapping paper face down and trim it into a rectangle. A good starting point is a sheet about twice as wide as the finished bag plus 2 inches for the seam, and about 1.5 times as tall as the bag you want plus 3 inches for the top fold and bottom. When this works, the rectangle looks longer than it is wide, not square.

    2. Fold the side seam. Bring the right edge over the left edge so the paper overlaps by about 1 inch, then tape that vertical seam from top to bottom. Keep the seam on the inside of the bag if the printed side should show outside. A strong seam is flat and does not buckle when you open the paper.

    3. Shape the tube. Stand the paper up and press it into a rectangular sleeve with two flat faces and two side gussets. Pinch the corners with your fingers and sharpen the creases. You should end up with a hollow paper tube that can sit upright for a moment on its own.

    4. Make the bottom folds. Flatten the open end so the side seams line up in the center, then fold the bottom edge up by about 2 inches. Open that flap and push the side corners inward to form two triangles. When it is correct, the bottom looks like a flattened diamond with four corners.

    5. Seal the bottom. Fold the top and bottom points of that diamond toward the center so they overlap by about 1 inch, then tape them down. Add a second strip of tape across the middle if the gift is heavy. A good bottom feels stiff and does not spring open when lifted.

    6. Create the top edge. Fold the open end down by 1 to 2 inches to make a crisp hem. This hides rough edges and gives the bag more structure near the opening. If you want handles, leave enough height above the fold for the punch holes.

    7. Punch the handles and thread ribbon. Punch two holes on each side, about 1 inch from the top and spaced 1 to 1.5 inches apart. Thread ribbon through each pair and knot the ends inside. The bag should lift evenly without tearing around the holes.

    8. Add the gift and close it. Place the gift inside, fold the top over once, and secure it with tape, a sticker, or a paper clip. If the gift is fragile, use a cardboard insert under it so the bottom stays flat. A finished bag stands on its own and closes without bulging at the seam. If you are unsure about using a fastener for a delicate item, consult a professional crafter or packaging specialist. For ribbon and closure hardware, the Craft & Hobby Association offers general safety and supply guidance, and NielsenIQ tracks gift-wrap and seasonal purchasing trends.

    How to reinforce a paper bag bottom without ruining the look

    Three handmade paper gift bags with rope handles

    You reinforce a paper bag bottom by adding a cardboard insert, using extra tape on the inside, and keeping the load centered. This matters most if the bag will hold books, glass jars, candles, or anything with sharp corners.

    Start with a piece of thin cardboard cut to the exact size of the bottom panel. A cereal-box weight insert is often enough for lightweight gifts, while corrugated cardboard gives more support for heavier items. Slide it into the bag before the gift goes in, not after. If the insert is loose, it defeats the purpose.

    Tape the bottom flap from the inside whenever possible. Two strips in an X pattern spread the stress better than one strip straight across. If the paper is thin, a second layer of paper on the inside bottom adds more strength without changing the outside look much. The bag still looks like wrapping paper, not a patched craft project.

    Paper clips can help during assembly, but they are not a permanent support. Use them to hold the bottom folds while you tape, then remove them. A clip left in place near the base can dent the paper or snag the gift when it is removed. For best results, keep clips near the fold line rather than the load-bearing center.

    The main trade-off is weight. A reinforced bottom makes the bag stronger, but it also adds thickness at the fold lines, which can make the bag look bulky. If you want a crisp, slim finish for a very light gift, a single cardboard insert and one strip of tape may be enough. If the gift weighs much more than a small box of chocolates, this style starts to reach its limit. Consumer packaging guidance from How2Recycle also notes that material mix and added layers can affect reuse and recycling choices.

    How to size the bag so the gift actually fits

    You size the bag by measuring the gift first, then adding room for the seams, folds, and top closure. The easiest mistake is cutting to the gift’s exact dimensions and forgetting that the bag needs extra paper to fold.

    For a rectangular gift, measure the width, depth, and height. Add about 1 inch to the width for the side seam, 1 inch to the depth for the gussets, and 2 to 3 inches to the height for the top fold or handle area. If the gift is an awkward shape, wrap it in a small cardboard box first or choose a bag that is slightly taller and wider than the object.

    As a rough guide, a gift that is 4 inches wide, 2 inches deep, and 6 inches tall will need a paper rectangle much larger than those numbers suggest. The flat paper has to become a 3D container, and the bottom fold alone can use several inches of height. If you cut too small, the bag puffs open at the seam or collapses at the base.

    Wide bags need more careful bottom work because the load spreads farther across the base. Tall narrow bags are easier to make, but they tip more easily if the gift is light. If you are not sure, build the first bag a little oversized and trim the top edge after the structure is done. That approach wastes less paper than starting too small. For sizing help, the U.S. Consumer Product Safety Commission gives practical guidance on keeping craft materials and small parts away from children.

    Best ways to close the top: handles, folds, or clips

    The best top closure depends on whether the bag will be carried, displayed, or handed over and opened right away. Handles suit carrying, a folded top suits a neat presentation, and paper clips work when you want a fast, temporary close.

    Ribbon handles are the most polished option. They need a hole punch and about 12 to 16 inches of ribbon per bag, depending on handle length. Punch the holes far enough from the edge that the paper does not rip, then knot the ribbon inside. If the paper is thin, reinforce the punch area with a small square of tape before punching.

    A folded top is the simplest close. Fold the opening down once or twice by 1 inch each time, then tape the folded flap to the front or back. This works well for gifts that do not need to be carried far. It gives the bag a clean line and hides the top edge of the wrapping paper.

    Paper clips are a quick temporary option. They are useful for rehearsing the fold before you commit with tape, or for holding a bag shut after a gift has been placed inside. They are not the most attractive choice, and they can leave a mark if the paper is soft. Use them when function matters more than finish.

    Common mistakes that weaken a paper gift bag

    The biggest mistakes are too little seam overlap, too little bottom support, and paper that is too thin for the gift. Each one costs you structure, and structure is the whole point of this project.

    A seam with less than about 1 inch of overlap tends to split when the bag is filled. Fix it by reopening the tube and re-taping with a wider overlap. A bottom with only one tiny strip of tape often pops under pressure, especially if the gift sits off-center. Add a second strip, and if the item is heavy, add a cardboard insert before you seal the base.

    Another common problem is overfilling. A paper gift bag that is filled to the top looks tidy for a moment, then the folds start to bow and the handles pull at the holes. Leave a small amount of breathing room above the gift so the top edge can fold cleanly. If the item is too tall, make a larger bag rather than forcing the top open.

    Rushing the creases also causes trouble. Soft folds make a floppy bag, while sharp creases give the paper a frame. Spend an extra 30 seconds on each major fold. That is the difference between a bag that stands upright and one that slumps on the table.

    For a deeper craft foundation, the guide to Paper Craft Techniques for Beginners is the right next step, because the same folding and scoring habits show up in boxes, envelopes, and other paper projects.

    How to adapt the bag for different gift shapes

    You adapt the bag by changing the width, depth, and closure style to match the object inside. A square object wants a more balanced bag, while a long object needs a tall narrow one.

    For a flat item like a notebook or gift card holder, make the bag shallow and give it a wide top fold. This keeps the paper from looking empty. For a bottle-shaped or cylindrical item, build a taller bag and use a cardboard insert so the base stays level. For small mixed gifts, such as a candle plus a note, place the items in a simple inner wrap or tissue bundle first so sharp edges do not poke through the paper.

    If you want the bag to look fuller without stuffing it, use paper clips or a loose ribbon tie to control the top instead of overloading the inside. That trick matters because the most common failure in a homemade paper gift bag is not poor decoration; it is too much force on a structure designed for small, light items.

    The honest limit is simple: this method is best for lightweight gifts and short trips. It is not the right choice for heavy or awkward items that need a rigid container. In contrast, a box or sturdier carrier is the better tool for those. But for a modest present in a few minutes, wrapping paper makes a good paper gift bag with almost no waste.

    How do you make a gift bag out of wrapping paper?

    You fold the wrapping paper into a tube, tape one side seam, close the bottom with a diamond fold, and finish the top with a hem, handles, or a fold-over closure. Start with a rectangle larger than the finished bag so you have room for seams and folds. If the paper is thin, add a cardboard insert at the base.

    How do you reinforce a paper bag bottom?

    You reinforce a paper bag bottom with a cardboard insert and extra tape on the inside. Cut the insert to the exact bottom size, slip it in before the gift, and tape the inner flaps in an X or cross pattern. That keeps the base flat and reduces the chance of tearing when the bag is lifted.

    What size paper do you need for a gift bag?

    You need a rectangle that is wider and taller than the gift by enough to cover the seam, bottom fold, and top closure. A practical starting point is width plus about 1 inch for the seam and height plus 2 to 3 inches for the top. For small gifts, a sheet around 24 x 36 inches is often enough, but the exact size depends on the object and the bag shape.

    Drafted with AI; not yet reviewed by a person.
  • How to Make Paper Flowers for Gift Toppers

    How to Make Paper Flowers for Gift Toppers

    Last updated: October 31, 2026

    Quick Answer: You can make a paper flower gift topper in about 15 minutes, and a small topper usually stays best at 2 to 3 inches wide. In this guide to How to Make Paper Flowers for Gift Toppers, the goal is simple: a flower that is light, flat, and secure enough for wrapping paper.

    A wrapped box can look carefully finished in minutes. The cleanest version is small, flat enough to stay put, and light enough not to crush the paper underneath. Build it from simple layers; do not try to fake a full bouquet flower.

    Key Takeaways

    • Small gift toppers work best when the flower stays under about 3 inches wide.
    • Cardstock holds shape; tissue paper gives volume; the two can be layered together.
    • Glue dots are the easiest attachment for gift wrap because they add grip without wetting the paper.
    • Petal shape matters as much as color: round, pointed, and fringed petals each change the final look.
    • A topper should be light, flat on the back, and finished with a ribbon or center that hides the glue point.

    What you need before you start

    hands wrapping a red gift box with ribbon

    A simple paper flower topper needs 2 to 3 sheets of cardstock or tissue paper, scissors, a pencil, glue dots or a glue stick, and a ribbon-wrapped gift box to anchor it. For a medium box, one 12 x 12 inch sheet of cardstock is enough for a medium flower and a few extra petals.

    Keep everything small and tidy. This is not the place for florist wire, heavy foam, or big layered blooms. The topper has to sit flat, survive handling, and look finished from 2 feet away. Honestly, I keep a coin, bottle cap, or small circle punch nearby for the center; a neat middle makes the whole flower read as polished instead of craft-table messy.

    Cardstock gives crisp petals. Tissue paper gives soft volume. Need airy? Use tissue for the top layer and cardstock for the base. Need a sharper outline? Use cardstock only.

    Below is the quickest comparison.

    Material / Method Best use Strength Typical size
    Cardstock Crisp petals and clean edges High 2 to 4 inches
    Tissue paper Soft, airy volume Medium 2 to 3 inches
    Glue dots Fast attachment on wrapped boxes High grip on paper 2 to 3 dots
    Glue stick Light layering Medium Small flat pieces

    How to make a paper flower for a gift topper

    Start with a flower that is 2 to 4 inches across. That size reads clearly on a gift box without swallowing the ribbon or making the package look top-heavy.

    1. Cut a base circle about 1 to 1.5 inches wide.
      Use cardstock or thick paper so the base stays firm. When it works, the circle lies flat and gives you a clean place to stack petals.

    2. Draw 5 to 8 petal shapes on a folded sheet.
      A simple petal can be round, teardrop-shaped, or slightly pointed. A folded sheet lets you cut multiple petals at once, and the petals should come out close in size so the flower looks balanced.

    3. Cut the petals and separate them into two layers.
      Put larger petals in the bottom group and smaller petals on top. That size shift is what creates depth instead of a flat cutout.

    4. Curl or crease each petal slightly with your fingers or a pencil.
      A small curl gives the flower movement. If the petals bend instead of snapping, the flower will look softer and less stiff.

    5. Glue the outer ring of petals to the base circle.
      Space them evenly around the edge, leaving a little overlap. When the ring is right, the base circle should still peek through near the middle, but the edge should look full.

    6. Add the second layer of petals offset from the first.
      Place each petal between two petals below it, not directly on top of them. That offset is what makes the flower look layered instead of stacked in a square pattern.

    7. Finish with a center that covers the glue point.
      Use a small rolled paper spiral, a punched circle, a button, or a tight tissue knot. The center should hide any rough cuts and make the flower read as complete from across the room.

    8. Attach the finished flower to the gift box with glue dots.
      Put 2 or 3 glue dots on the back of the base circle, press it onto the ribbon or directly onto the wrapping paper, and hold for a few seconds. If it stays put when the box is tilted gently, it is ready. For fragile paper or a box that will be carried often, check the adhesive instructions on the package or ask a craft professional if you are unsure.

    This method can scale a little, but it works best when the topper stays small. A 2-inch flower looks neat on a small favor box, while a 3-inch flower suits a standard gift box. Go much larger, and the topper starts behaving like decoration instead of packaging.

    Which petal shapes look best on a gift topper?

    hand holding colorful paper flowers

    Round and pointed petals are the easiest shapes to read on a small gift, and fringed petals add texture when the flower needs more personality. A gift topper does not need botanical accuracy; it needs a clear silhouette at small scale.

    Round petals feel soft and friendly. They work well for birthday boxes, baby gifts, and anything that should look gentle. Pointed petals create a sharper, more graphic flower that suits modern wrapping with solid ribbon or striped paper. Fringed petals help when the topper feels too plain, because even a few snips around the edge can turn a basic circle into a chrysanthemum-like bloom.

    The size of the petal matters as much as the shape. Too long, and the flower looks floppy. Too short, and it can read like a rosette with no definition. A good working range is about 1 to 2 inches long for a small gift flower. That keeps the petals visible without making the topper spread too far across the box.

    Thick cardstock calls for wider petals so they do not look stiff. Tissue paper needs narrower petals so the layers do not bunch up too much. The goal is a topper that reads at arm’s length and still feels light enough for a gift package. Otherwise, it turns into paper soup.

    Layering petals so the flower looks full, not bulky

    Layering works best when the bottom petals create the width and the top petals create the finish. That structure gives a small flower the fullness of a larger bloom without making it heavy.

    Begin with the widest petals on the base circle. Space them evenly, and let the tips slightly overlap. Then add a second ring that sits in the gaps between the first ring. Want more dimension? Add a third ring with petals that are about 1/4 inch shorter than the first set. That small difference keeps the flower from looking like a stack of identical cutouts.

    For tissue paper, 2 layers are usually enough. Tissue builds bulk quickly, and too many sheets can make the topper wrinkled instead of fluffy. Cardstock usually looks better with 3 layers because the paper is stiffer and needs more overlap to feel full.

    A common mistake is to push every petal straight up. On a gift topper, that creates a dome that gets crushed as soon as the box is handled. Keep the layers low and angled outward a little, so the flower stays profile-friendly. If a petal lifts too far, press it down with your fingers for a few seconds before moving to the next one.

    The center matters here too. A tight paper circle, a rolled strip about 1/4 inch wide, or a small layered punch shape can pull the whole flower together. Without that final cover, the center may show glue marks or uneven cuts, and the topper stops looking finished.

    How do you attach paper flowers to a gift?

    Attach paper flowers to a gift with glue dots or a strong ribbon anchor, because both can keep the topper secure without soaking the wrapping paper. Glue dots are usually the quickest option for most gift boxes.

    Place the flower where the ribbon intersection or central top panel gives it a natural anchor point. With a bow, tuck the flower into the knot or press the back of the flower onto the ribbon tails. If the box is wrapped flat with no ribbon, place 2 to 3 glue dots on the flower base and press it to the paper for several seconds.

    A glue stick is less reliable for a topper because it can lose grip on slick wrapping paper. Liquid glue can warp thin paper and leave visible wrinkles. Glue dots avoid both problems, which is why many crafters prefer them for a clean gift finish.

    If the flower is made from cardstock and feels stiff, a single glue dot in the center may not be enough. Use two dots spaced apart on the back of the base circle. If the topper is made from tissue paper, do not press too hard, because tissue can tear before the adhesive grabs.

    One useful check: lift the box by the sides and tilt it slightly. If the flower slides, add another dot or shift the flower closer to the ribbon. The topper should feel like part of the package, not something perched on top.

    Common mistakes that make paper flower toppers look messy

    The most common mistake is making the flower too large for the box, and the cost is a topper that overwhelms the wrapping instead of finishing it. If the box is small, keep the flower under about 3 inches wide. A larger bloom belongs on the package only if the rest of the wrapping is very simple.

    Another problem is using too much glue. Wet adhesive can stain tissue paper, buckle thin cardstock, and leave shiny spots. Use glue dots when possible, and use just enough pressure to hold the layers together. If you need liquid glue for a center, apply it with a toothpick or a very small dab.

    Uneven petals are another trap. If each petal has a different width or length, the flower looks accidental. Cut a template first, then trace it 5 or 6 times so the set stays consistent. A tiny mismatch is fine; a dramatic mismatch reads as a mistake.

    People also forget the back of the flower. A rough underside with dangling scraps can scratch ribbon or pop loose from the package. Trim the underside clean and flatten any raised glue before attaching it.

    Finally, do not overload the topper with beads, too many paper curls, or heavy embellishments. A gift topper needs lightness. If it starts to droop after a few minutes, the decoration is too dense for the paper and the box.

    Small-scale paper flowers that work best on gift packaging

    Small-scale paper flowers work best when the parts are simple, the center is compact, and the whole piece stays under 1/4 inch thick at the back. That slim profile is what keeps the topper from fighting the ribbon or snagging on hands.

    A single rosette shape is often the easiest small topper. Cut a spiral strip of paper about 1/2 inch wide, roll it tightly, and flatten the base into a flower-like spiral. It gives a polished look with very little material. A layered daisy is another good choice: 5 to 8 petals, one small center, and a flat base. A tiny peony-style flower can work too, but it needs more petals and more trimming, so it takes longer.

    The paper choice changes the result. Cardstock gives crisp edges and suits clean, modern wrapping. Tissue paper gives a softer finish and looks good on gifts with satin ribbon or bright wrapping paper. Mixing the two is useful when the topper needs body and softness at the same time.

    This is not the right method for a full bouquet look or for large wall flowers. It is meant for package tops, favor boxes, and gift bags that need a finished accent in a very small footprint. For broader beginner techniques, the hub on [Paper Craft Techniques for Beginners] can support the basic cutting and folding skills that make this easier.

    A gift topper should look made on purpose, not oversized. If the flower still looks balanced when you view it from a little distance and the ribbon remains visible, the scale is right.

    What paper works best for paper flowers?

    Cardstock works best for crisp petals, while tissue paper works best for soft, airy layers. Cardstock in the 65 to 80 lb range is sturdy enough for small toppers without feeling bulky, and tissue paper is useful when you want volume without weight. For a clean gift finish, many toppers use both: cardstock for the base, tissue for the top. See also [How to Choose Cardstock Weight] and [Gift Wrapping Basics].

    How do you make small paper flowers?

    Make small paper flowers by cutting 5 to 8 petals, building them on a 1 to 1.5 inch base, and layering the petals in two rings. Keep the flower about 2 to 4 inches wide so it still reads clearly on a gift box. Small petals, tight centers, and low layering are what make the piece look finished instead of crowded.

    How do you attach paper flowers to a gift?

    Attach paper flowers to a gift with glue dots, pressing them to the ribbon or wrapping paper for a few seconds until they hold. Two or 3 dots usually secure a small topper, but if the box will be handled a lot, check the adhesive instructions or ask a craft professional before relying on a single attachment point. If the package has a ribbon knot, that is the strongest place to anchor it. For slick paper, avoid liquid glue because it can wrinkle the wrap.

    Drafted with AI; not yet reviewed by a person.
  • How to Make Fabric Throw Pillow Covers Without a Sewing Machine

    How to Make Fabric Throw Pillow Covers Without a Sewing Machine

    Last updated: October 23, 2026

    Quick Answer: you can make fabric throw pillow covers without a sewing machine in about 8 simple steps, using a pillow insert, fabric, scissors, and either iron-on hem tape or fabric glue.

    Key Takeaways

    • Gather the insert, fabric, scissors, and hem tape or glue before you cut.
    • Measure first, then add seam allowance and back overlap on every side.
    • Envelope backs close flat and skip zippers, buttons, and exposed tape.
    • Hem tape gives a sharper edge; glue is easier when you want to avoid heat.

    A fabric throw pillow cover without a sewing machine is a fast way to hide a tired insert and update a room without using a machine. The method uses fabric, iron-on hem tape, or fabric glue, plus scissors and a pillow insert that already matches the size you want. For simple home decor updates, it is one of the easiest DIY wall art ideas to coordinate with.

    What you need before you cut anything

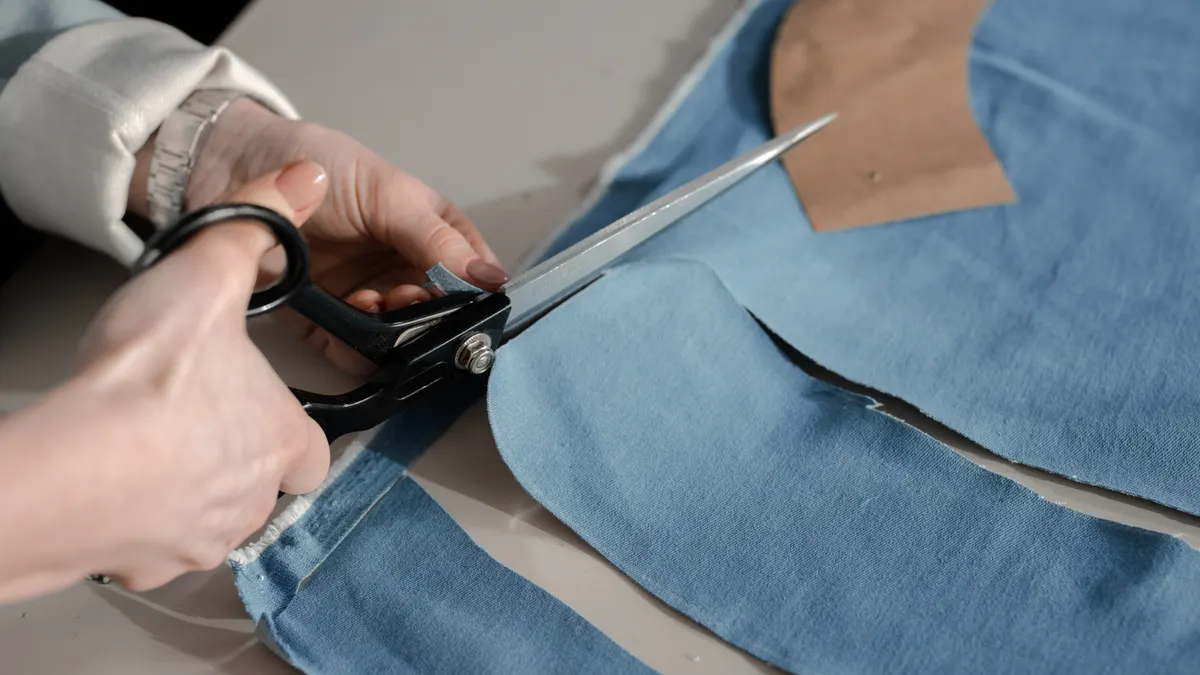
    Hands cutting blue fabric with scissors

    You need a pillow insert, fabric, scissors, and either iron-on hem tape or fabric glue before you start cutting. A ruler or measuring tape helps, and an iron is useful if you choose hem tape. If you want a crisp envelope closure, plan for at least 4 to 6 inches of overlap in the back.

    Choose fabric with a little body. Cotton duck, canvas, linen, and medium-weight upholstery-style fabric hold corners well and do not slide around as much as very thin quilting cotton. Very stretchy knit fabric is the wrong choice for this project because it shifts, curls, and can leave the cover looking saggy. If the room gets heavy use, pick a fabric that can handle handling without fraying at every cut edge.

    The fabric throw pillow covers without a sewing machine method works best with stable fabric, and that matters even more on a quick refresh. If you are updating a couch, bench, or reading nook, a cover in the right color can change the room without a bigger project. For homeowners comparing textile care, the U.S. Consumer Product Safety Commission has general guidance on fabric-related product safety, and manufacturer directions still matter most for adhesives.

    The rest of this guide assumes a standard square throw pillow insert. If your insert is a rectangular lumbar shape, the same method still works, but the measurements change.

    How do you measure fabric for a no-sew pillow cover?

    Measure the pillow insert first, then add seam allowance and closure overlap to each side. For a square cover, cut one front panel at the insert size plus 1 inch on each side, and cut the back as two overlapping panels that are each the insert size plus 1 inch in height and enough extra length to create a 4 to 6 inch overlap.

    Here is the simplest way to size it:

    1. Lay the pillow insert flat and measure one edge across the face, not around the stuffing.
    2. Add 1 inch total for hem allowance, so a 18-inch insert becomes a 19-inch cut size for the front panel.
    3. For the back, cut two pieces with the same height as the front and widths that give you a 4 to 6 inch overlap when they sit on top of each other.
    4. If the fabric frays easily, add another 1/2 inch to each raw edge so the fold or tape has enough material to grip.

    A common mistake is cutting the cover the exact size of the insert. That produces a pillow that is hard to stuff, pulls at the corners, and often leaves the closure gap under tension. A slightly larger cover looks fuller and closes more cleanly.

    If the insert is very plush, cut the cover a little smaller than the insert face, usually by about 1/2 inch total, so the corners look more filled out. Do not go smaller than that unless you want a very tight, tailored look.

    How to make a fabric throw pillow cover without a sewing machine with an envelope closure

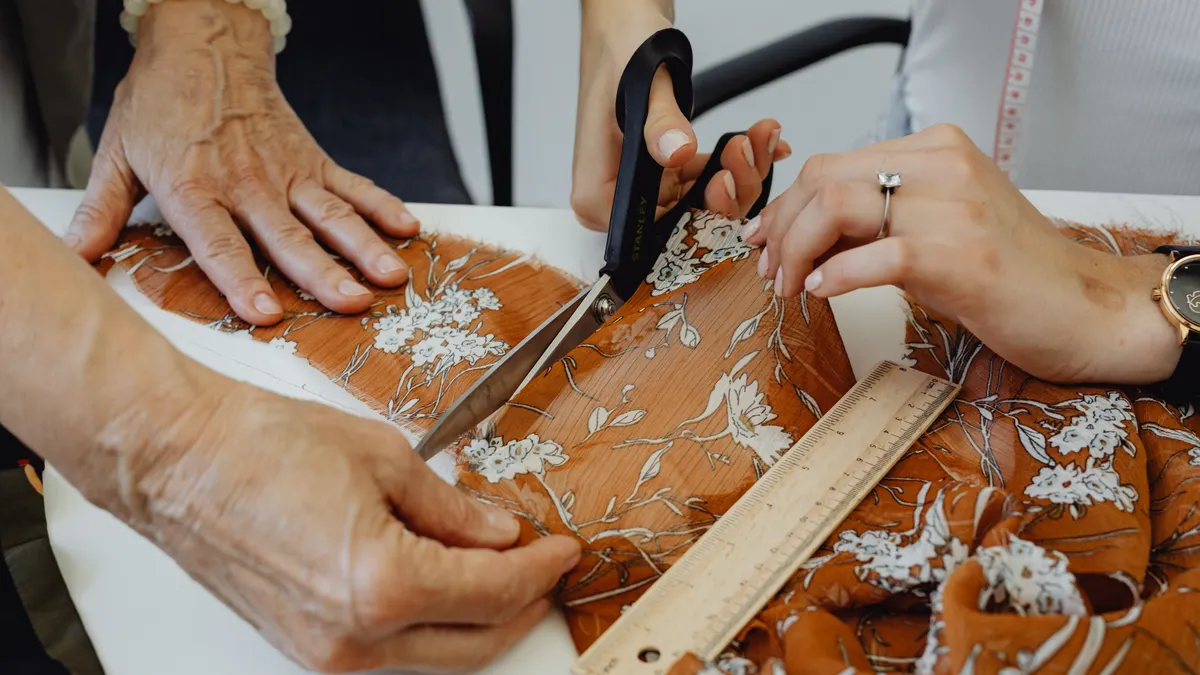
    Hands cutting patterned fabric with scissors and ruler

    An envelope closure is the easiest no-sew finish because it closes flat and does not need buttons, zippers, or visible tape on the outside. It works best for square throw pillows where the back can overlap by at least 4 inches.

    1. Cut one front panel and two back panels to size. The front should match the visible face of the pillow insert, plus 1 inch for turning the edge. Each back panel should be the same height as the front panel and wide enough to overlap the other panel by 4 to 6 inches.
    2. Fold over all four sides of each panel by 1/2 inch, then fold again by another 1/2 inch if the fabric frays. This gives you a cleaner edge and hides the raw cut line.
    3. Secure the folds with iron-on hem tape or a thin line of fabric glue. If you use hem tape, press with a hot iron for the time listed on the package. If you use glue, hold the fold flat under a book or cutting mat until it sets. If you are unsure about the product or the fabric, consult the package directions or a fabric professional before committing to heat or adhesive.
    4. Place the two back panels right sides facing up and overlap them in the center. The overlap should look like a pocket, not a gap.
    5. Lay the front panel right side down on top of the back assembly and line up all edges.
    6. Bond the three open sides with hem tape or fabric glue, leaving the overlap edge unsealed so the cover can open and close.
    7. Turn the cover right side out and push out the corners with a blunt tool, such as a pencil eraser or chopstick.
    8. Slide the pillow insert through the back opening. If the measurements worked, the insert should fill the corners without straining the seams.

    The result should be a cover that lies flat at the seams and closes with a hidden overlap in back. If the opening gapes, the back pieces are too short. If the cover feels puckered, the front panel is too small or the fabric has stretched during gluing.

    Fabric glue or iron-on hem tape: which closure method works better?

    Iron-on hem tape gives a cleaner edge, while fabric glue is easier when you do not want to heat the fabric. Both can make a usable no-sew pillow cover, but they behave differently on the finished piece.

    Iron-on hem tape is usually the better choice for cotton, linen, and canvas. It creates a firmer bond and keeps folds flatter, which matters on corners and long straight edges. It also gives a more predictable finish when you are working with a 1/2-inch fold. The trade-off is that you need an iron and enough space to press each edge carefully. Manufacturer instructions from the tape brand are the most reliable source for temperature and press time.

    Fabric glue is better when the fabric cannot be pressed well, when you are working on a small table, or when you want to avoid heat. It is more forgiving for beginners, but the bond can feel stiffer or show through thin fabric if you apply too much. A thin line works better than a heavy bead. The directions on the adhesive package, and guidance from the product maker, should come before guesswork.

    Do not use a glue that stays wet too long on slippery fabric. That creates smudges, warping, and uneven edges. If you see glue squeezing out from the fold, wipe it immediately before it dries. If you are using hem tape, follow the package temperature and pressing directions instead of guessing. Different products are made for different fabrics, and the bond depends on that.

    For a pillow that will be handled a lot, hem tape usually holds a neater shape. For a fast decorative cover that may be changed often, fabric glue is often enough.

    How do you cut and finish the fabric without frayed edges?

    Cut the fabric square, keep the grain straight, and finish the edges before you join the panels. That order keeps the pillow from twisting and makes the closure line easier to align.

    Start by laying the fabric on a flat surface and using a ruler or measuring tape to mark the cut line. A long straightedge helps with 18-inch, 20-inch, or larger pillow sizes because even a slight angle becomes obvious once the cover is stuffed. After cutting, check that opposite sides match within about 1/8 inch. If one side is longer, trim it now.

    For fray-prone fabric, fold and press 1/2 inch twice before bonding. If you only fold once, raw threads can slip out over time, especially on linen or loosely woven cotton. If the fabric is thick and does not want a double fold, a single 1/2-inch fold plus hem tape is usually enough.

    A clean corner is one of the easiest details to get wrong. When you fold the edge, stop the fold cleanly at the corner instead of bunching extra fabric into a lump. If the corner looks bulky before it is closed, it will look worse after the insert goes in. Trim away a tiny triangle from the corner only if needed, and keep the cut inside the fold line so you do not weaken the edge.

    One useful standard: keep all visible seam allowances consistent at 1/2 inch. That makes the cover easier to square up and reduces lopsided edges.

    Common mistakes that make a no-sew pillow cover look sloppy

    The biggest mistakes are cutting too small, using the wrong fabric, and sealing the closure before checking the overlap. Each one costs you a cleaner finish, and in some cases it means remaking the whole cover.

    A cover cut too small will fight the insert. The corners pull, the overlap opens, and the pillow looks tight in the wrong way. The fix is to add more width before you bond anything. If you already assembled it, there is usually no elegant rescue other than opening the seams and recutting.

    Thin, slippery fabric often looks nice on the bolt and disappointing on the pillow. It slides while you are closing it and wrinkles around the insert. If that is the fabric you have, cut it with extra care and use a stronger adhesive like iron-on hem tape rather than relying on a weak glue line.

    Another mistake is making the envelope overlap too short. If the back panels overlap by only 1 or 2 inches, the insert can peek through as soon as the pillow shifts. Give yourself 4 inches at minimum, and 6 inches if the pillow is full or the fabric is slick.

    Do not flood the edge with glue. Heavy glue adds ridges, stains thin fabric, and can make the pillow feel stiff. A narrow, even line is enough for most covers. If you need a stronger hold, press the fold again after the first bond sets rather than piling on more adhesive.

    When a no-sew pillow cover is the right choice

    A no-sew pillow cover is the right choice when you want a fast update, a removable seasonal cover, or a beginner project that uses basic tools instead of a machine. It is especially useful when you want to refresh living rooms, guest rooms, or rented spaces with a small decor change.

    It is not the right choice if you want a washable cover that will be laundered constantly, if the pillow will get rough use, or if you need precise upholstery-grade construction. The bond from fabric glue or iron-on hem tape is practical, but it is not the same as stitched seams. For heavy-duty use, a sewn cover is the better route.

    This method also works best on standard throw pillows, not thick floor cushions or structural pieces. Those need different construction and more durable joining methods. If you are trying to cover an oddly shaped insert, the envelope closure can still help, but the fit will take more trial and error.

    For general craft guidance on adhesives and fabric handling, the manufacturer directions on the hem tape or glue package matter more than guesswork. The material label is the standard to follow.

    Can you make pillow covers without sewing?

    Yes, you can make pillow covers without sewing by using fabric glue or iron-on hem tape to bond the edges and create an envelope-style back. The key is to measure the pillow insert first, then cut enough overlap so the back stays closed when the pillow is stuffed. A square 18-inch or 20-inch insert is the easiest place to start.

    The finished cover will look best on medium-weight fabric with a straight weave. Thin knit fabric, very loose linen, and slippery satin are harder to keep flat. If you want the least frustrating first project, choose cotton duck, canvas, or another stable fabric and keep the design simple.

    What fabric is easiest for pillow covers?

    Cotton duck or medium-weight canvas is usually the easiest fabric for pillow covers because it cuts cleanly, folds neatly, and holds shape well. Linen and medium cotton also work if they are not too thin. Very stretchy or silky fabric is harder to align and can shift while you are closing the cover.

    A fabric with a firm hand also makes the envelope closure less fussy. It stays where you place it, which matters when the overlap needs to stay even for 4 to 6 inches. If the fabric frays a lot, plan to fold the edges twice or use a stronger bond.

    How do you close a no-sew pillow cover?

    An envelope closure is the simplest way to close a no-sew pillow cover. You make two back panels that overlap in the center by at least 4 inches, then bond the outer edges so the insert slides in through the overlap. The opening stays hidden, and the cover can be removed later without cutting anything apart.

    If you want a firmer closure, iron-on hem tape usually holds the overlap flatter than glue alone. If you want a faster project, fabric glue works, but it needs careful application so it does not seep through thin fabric.

    Drafted with AI; not yet reviewed by a person.

  • How to Make a Simple Origami Flower

    How to Make a Simple Origami Flower

    Last updated: October 23, 2026

    Ten to fifteen minutes. One square sheet. Enough for a simple origami flower with four petals and a compact folded center. This guide walks through the fold sequence with clean creases and a beginner-friendly pace.

    Key takeaways

    • Use square paper, not rectangular scrap, or the folds will not meet cleanly.
    • Crisp creases matter more than fancy paper; a bone folder helps on thicker sheets.
    • The simplest flower design is built from a kite-shaped base, then repeated petal folds.
    • When the flower keeps opening back up, the crease lines are too shallow or the paper is too stiff.
    • This is a beginner project, but the final shape improves a lot when the folds are precise.

    What you need before you start

    A square sheet of origami paper is usually the easiest starting point; 15 cm by 15 cm feels right for most beginners. Smaller paper, such as 10 cm squares, works too, but the folds tighten up fast. Plain copy paper can be cut into a square if that is all you have, though it will feel stiffer and show more wrinkling.

    You also need a flat table, clean hands, and something to sharpen creases. A bone folder is useful here because it presses the fold line without tearing the paper. No bone folder? The back edge of a spoon or even a fingernail works in a pinch.

    Choose paper that is colored on one side if you want the petals to show contrast when the flower opens. Thin origami paper is easier for beginners than cardstock because it bends sharply and releases more easily into a flower shape. Thick paper makes the center bulky, and the petals spring apart unevenly. That part gets fussy in a hurry.

    Before folding, make sure every corner is aligned exactly. Off-center corners are the main reason a simple origami flower ends up lopsided. A 1 mm mistake at the start can become a petal that points away from the rest of the flower.

    How do you fold the base for a simple origami flower?

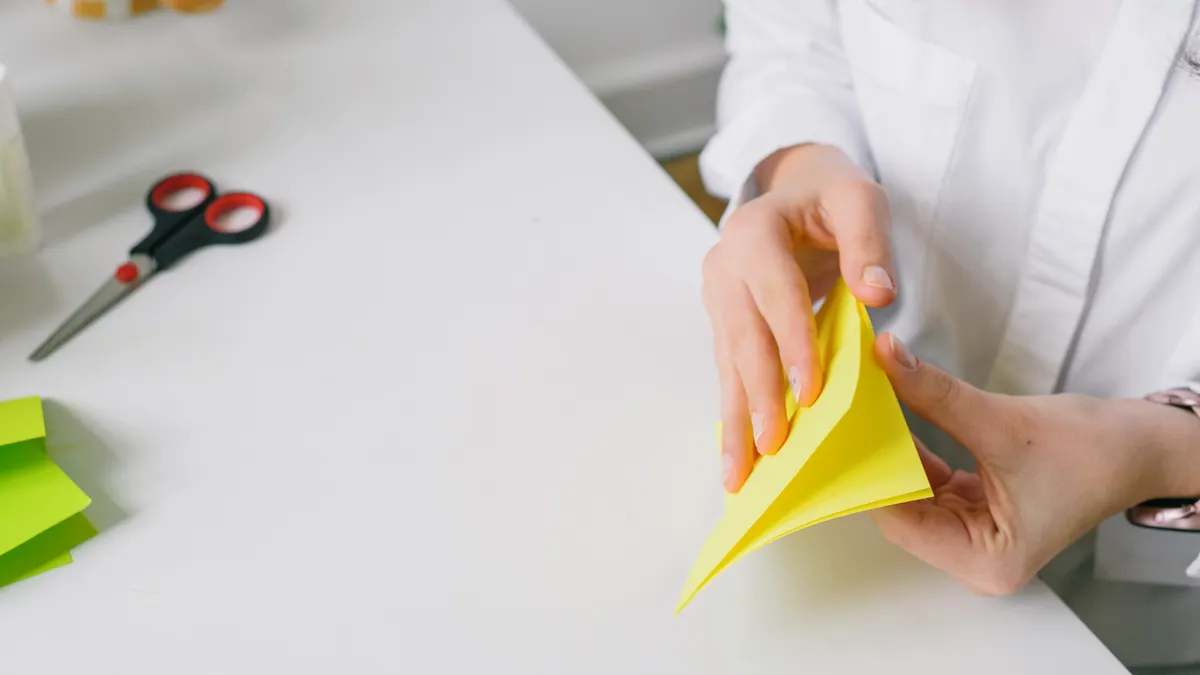
    Person folding yellow paper at a table

    You begin with a kite-shaped base, because that shape gives the flower its four main petals. Start with the colored side down if your paper has a colored side.

    1. Fold the square in half corner to corner to make a triangle, then open it. You should see one diagonal crease running across the paper.
    2. Fold the opposite corner to corner, then open it again. The paper should now have an X of creases crossing at the center.
    3. Bring the left and right corners toward the center so the paper collapses into a smaller square or diamond shape. When it works, the top flap lies flat and the edges line up neatly.
    4. Turn the model over and repeat the collapse if the paper resists. The paper should now look like a compact diamond with four layers.
    5. Fold the lower side edges toward the center line on both sides to create a kite shape. The new edges should meet cleanly in the middle without overlapping.
    6. Repeat that same fold on the back. When it works, the model looks like a narrow kite on each side, with four crisp points.
    7. Fold the top layer’s side edges inward again so the shape gets slimmer.
    8. Flatten the model and sharpen every crease with a bone folder. The base should hold its shape without springing open.

    At this stage, the paper is no longer a square flower. It is a folded base with four slim sections that can become petals. If one side looks wider than the other, stop and realign it now. Fixing it here is far easier than wrestling with crooked petals later.

    How do you turn the base into petals?

    Turn the base into petals by opening the top layers and folding them outward one at a time. That is the moment the model stops looking like a geometric exercise and starts reading as a flower.

    Lift the top flap gently at its tip. Press the side folds apart so the flap opens into a petal shape. The inside of the paper should flatten into a wider diamond, and the top point should spread into a rounded petal edge. Should the flap fight back, the earlier folds were not sharp enough.

    Repeat the same opening fold on the remaining three flaps. Work slowly and keep the center point aligned while you open each petal. Each finished petal should sit evenly around the center, with the same amount of paper showing on every side.

    If your flower looks pinched, flatten each petal from the center outward, not from the edges inward. That keeps the paper from wrinkling near the tip. A light touch matters here; pressing too hard can crease the petal into a hard ridge instead of a soft curve.

    For a neater flower, pinch the base of each petal once the shape is open. That small pinch helps the petals stay separated. You can also curl the tips slightly with a pencil if you want the flower to look softer, though that is optional and less crisp than a straight-fold look.

    When the center opens too wide, press the inner layers back together and re-crease the side lines. A simple origami flower should look balanced, not flattened like a starfish. The goal is a clean ring of four petals around a compact center.

    Why does my origami flower keep unfolding?

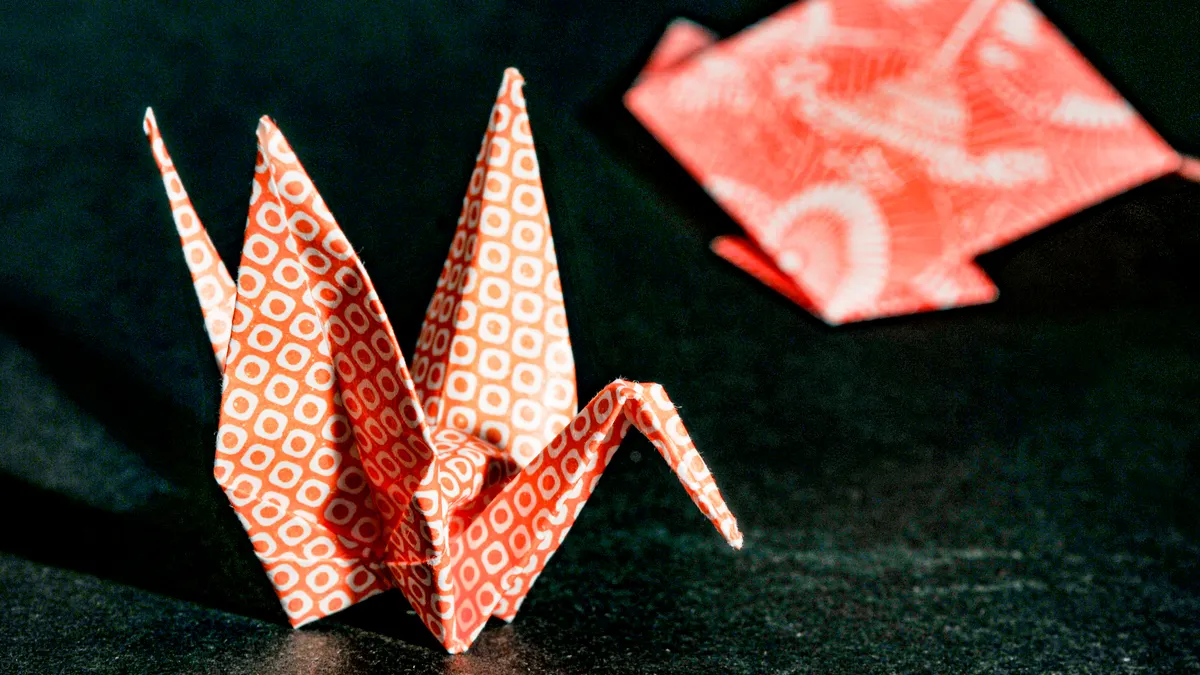
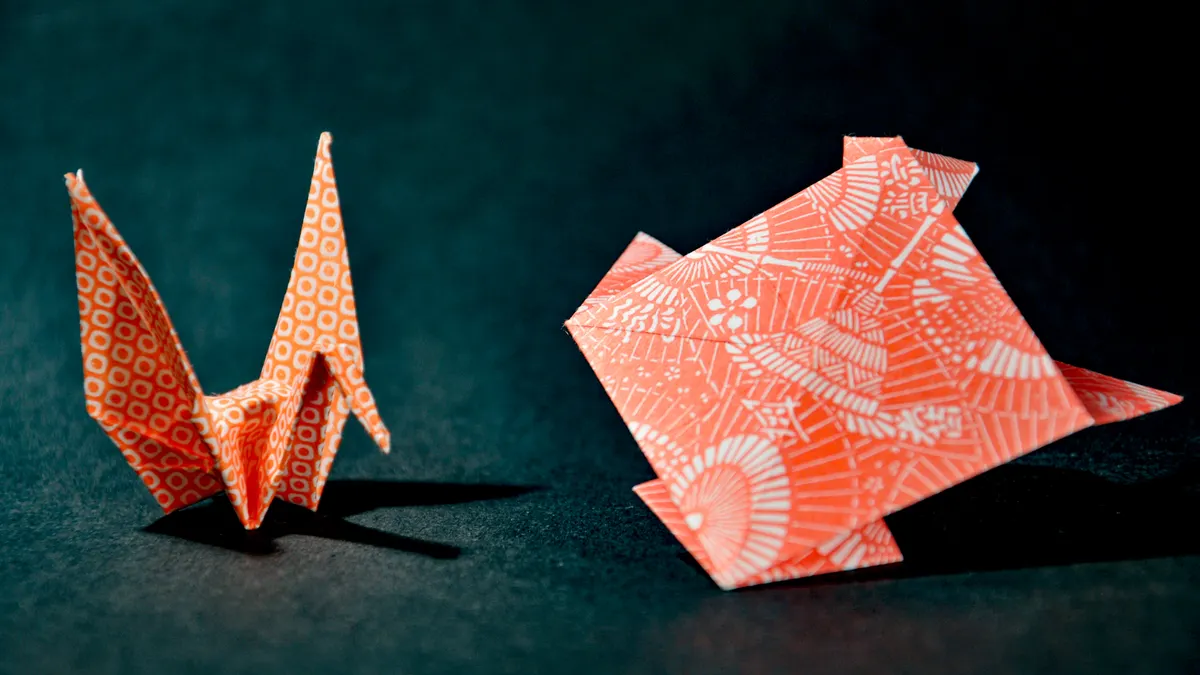
    Two patterned origami cranes on dark background

    Your origami flower keeps unfolding when the creases are shallow, the paper is too thick, or the center was not locked tightly enough. Usually, the fix is in the fold pressure, not the design.

    Open each petal slightly and sharpen the base crease with a bone folder. Press along the exact fold line, not beside it. A weak crease lets the paper relax back toward its original square shape, especially if the paper is springy or coated.

    Paper choice matters here. Lightweight origami paper holds a petal fold better than copier paper or gift wrap. If you only have thicker paper, make the model larger, around 20 cm square, so the folds have more room to settle. Tiny folds in thick paper are hard to lock.

    One petal pulled tighter than the others makes the flower twist and begin to open at the loose side first. Match the fold angle on each petal and check the center after every fold. The top should look symmetrical from above.

    If the base keeps separating, flatten the center more firmly before opening the petals. That center point should feel compact, almost like a small knot in the paper. You do not need glue for this beginner design, and glue can leave the petals stiff and flat, which defeats the point of origami.

    Paper size selection: what works best for a beginner?

    A 15 cm square is the easiest size for a first flower because it gives enough room for the layers without making the folds awkward. Anything between 12 cm and 20 cm square is workable, but the feel changes fast as you move smaller.

    Smaller paper makes the finished flower tighter and more delicate, which is nice for a card or table setting. The trade-off is that the center becomes harder to hold while you fold. Larger paper is easier to control, but the flower can look loose if the folds are not sharpened well. It is a bit of a balancing act.

    If you are cutting paper yourself, measure the square carefully before you start. A rectangle trimmed into a square by eye often ends up slightly off, and that small mismatch shows up later as uneven petals. Use a ruler if you want the sides to match.

    Paper weight matters as much as size. Thin origami paper folds sharply and opens neatly. Printer paper is acceptable for practice, but it produces softer petals and a thicker center. Avoid very glossy paper for your first try, because it slides while you crease and can split at the corners.

    For a bouquet-style display, make several flowers in the same size so they look related. If you want variety, change the color rather than the dimensions. A mix of 15 cm squares in three colors looks more coherent than a mix of random sizes.

    Beginner folding tips that make the flower cleaner

    Sharp folds and slow alignment make a simple origami flower look deliberate instead of messy. The biggest improvement comes from pausing at each corner before you crease.

    Hold the paper at the corners, not the middle, when you line it up. Corners show you whether the edges truly match. If the corners drift by even a little, the final petals will fan unevenly.

    Fold from the center outward with your fingers first, then press with the bone folder. That sequence gives you control before you commit to a hard crease. On the first few folds, you can even unfold and correct them if the angles look wrong.

    Keep the model flat on the table while you work. Holding it in the air makes the layers shift. A flat surface is especially useful during the collapse step, where several layers need to meet at once.

    Do not rush the petal opening. Beginners often pull too hard and tear the inner layers near the base. A gentle lift with both thumbs is enough. If the flower resists, back up one fold and sharpen that crease instead of forcing the paper.

    If you want the flower for a card, small gift, or quick craft session, stop after the basic four-petal shape. If you want a fuller look, make two or three flowers and cluster them together. That is where the design starts to work well as a bouquet accent without becoming an advanced paper flower project.

    Simple variations for bouquets and cards

    You can make the same simple origami flower look different by changing paper color, petal shape, or size. That keeps the fold sequence familiar while giving you more use cases for gifts and decorations.

    For a bouquet-style group, fold three to five flowers in matching paper weights but different colors. A consistent 15 cm square size keeps the set from looking chaotic. Add a folded green stem or a separate paper leaf if you want the arrangement to read as a bouquet rather than loose flowers.

    For a card, use smaller squares, around 10 cm, and flatten the back of the flower before attaching it. That keeps the card from bulking up too much. A small dot of glue or double-sided tape can hold the flower in place without changing the fold pattern.

    If you want a fuller look, curl the petal tips slightly with a pencil after the flower is complete. That gives a softer profile and makes the petals catch the light. If you want a sharper, more graphic look, leave the tips straight and crisp.

    This design is a good fit for the easy paper craft ideas for kids hub because it is simple, visual, and fast to repeat. It is not the right choice if you want a highly realistic bloom or a complex layered flower. For that, a more advanced paper flower tutorial would be the better next step.

    What paper works best for origami flowers?

    Thin square origami paper works best for origami flowers. It folds sharply, keeps the center compact, and opens into petals without much resistance. A 15 cm square is a reliable starting point. Printer paper can work for practice, but it is thicker and usually gives softer, less precise petals.

    Why does my origami flower keep unfolding?

    Your origami flower keeps unfolding because the creases are not tight enough or the paper is too stiff for the fold pattern. Repress each crease with a bone folder and check that the center is folded flat. If the paper is thick, make a larger flower so the layers do not spring apart as easily.

    Can beginners make origami flowers?

    Yes, beginners can make origami flowers. This simple design uses repeated folds and a small number of steps, so it is manageable with square paper and a flat surface. The hardest part is the collapse step, but careful alignment and firm creases make it much easier on a first try.

    Drafted with AI; not yet reviewed by a person.
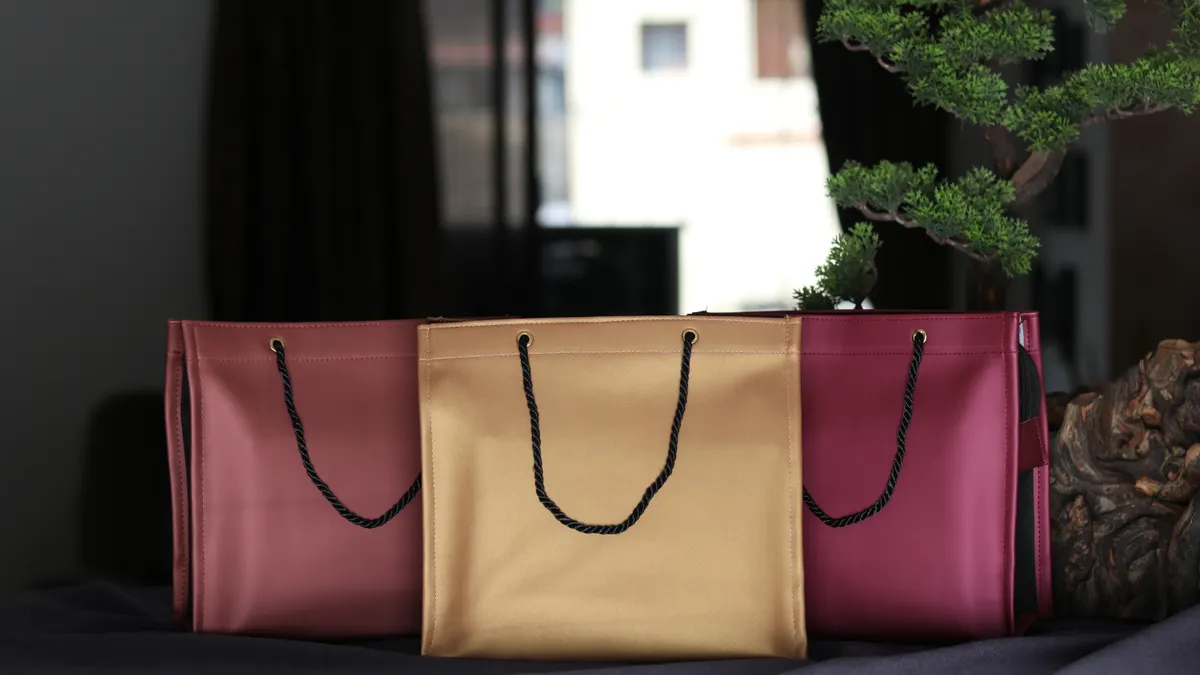
  • How to Make a Boho Macrame Wall Hanging

    How to Make a Boho Macrame Wall Hanging

    Last updated: October 23, 2026

    Key Takeaways

    • Gather the basic supplies first: cord, a dowel, scissors, and a measuring tape.
    • The project uses a few knots, but the sequence matters.
    • A short run of lark’s head knots, square knots, and a shaping row creates a finished look.
    • Match cord thickness to the wall hanging size and the dowel to the finished weight.

    A boho macrame wall hanging starts with a simple knot sequence, a straight wood dowel, and clean fringe finishing. This guide explains how to make a boho macrame wall hanging with a few basic materials. If the knots are even and the ends are trimmed on purpose, the piece looks decorative; if not, it looks like practice cord on a stick.

    What you need before you start

    White macrame wall hanging with fringe on a wall

    You need macrame cord, a wood dowel, scissors, and a measuring tape before you tie the first knot. For a beginner wall hanging, a medium-size cotton cord, a dowel about the width of your finished piece, and a clear workspace where you can lay out 6 to 12 cords without tangling them are practical starting points.

    The cord matters more than most people think. Soft cotton macrame cord is usually the easiest place to begin, though the best choice depends on the look you want. It is easier to comb into fringe and easier to tighten evenly than slick synthetic cord. For a first project, choose cord that holds shape without feeling stiff in your hands. If the cord is too thin, the pattern looks fussy and takes longer to finish. If it is too thick, the knots can turn bulky fast and hide the design.

    The dowel sets the look. A plain wooden dowel keeps the piece calm and natural, which suits boho styling better than a painted rod with visible hardware. Make sure the dowel is sturdy enough to hold the weight of the cords without bending. For a small wall hanging, a shorter dowel works well because the knots stay centered and the fringe does not sag too far below the base.

    A measuring tape is not optional. It keeps your left and right cord lengths even, which matters more than decoration at this stage. Uneven starting lengths create a lopsided bottom edge that is hard to fix later. Scissors should be sharp enough to cut cleanly through all strands in one motion, not crush them.

    If the goal is a neat decorative wall piece rather than a craft sample, this is also the right point to decide on scale. A beginner-friendly hanging usually looks best when the widest knot section is smaller than the dowel, leaving a visible frame of empty space on both sides. That open space is part of the boho look.

    How to make a boho macrame wall hanging

    You make a boho macrame wall hanging by attaching folded cords to a dowel, tying a short sequence of basic knots, shaping the center, and finishing the fringe so the bottom edge looks intentional. The whole piece can be built from a few knots, but the order matters.

    1. Cut your cords to length. Measure and cut several cords to the same length, usually longer than the finished drop so you have room for knots and fringe. The cut ends should be even, and every strand should hang from the dowel at roughly the same starting point.
    2. Attach each cord to the dowel. Fold a cord in half and secure it to the wood dowel with a lark’s head knot. If you are new to macrame, check a basic knot guide or consult a craft instructor before you start, and use a reliable source such as the Britannica overview of macramé or The Spruce Crafts’ knot tutorials. When it works, the cord grips the dowel cleanly and both ends hang straight down on the same side.
    3. Repeat until the dowel is filled. Keep adding folded cords side by side until you reach the width you want. The cords should sit close together without overlapping into a thick lump, and the dowel should still be visible between the hanging bundles.
    4. Make a row of square knots in the center. Use four cords at a time to tie square knots across the middle section. Tighten each knot to the same feel so the row sits level instead of twisting into a spiral. A good row looks like a flat band with distinct knot ridges.
    5. Shift to a second knot row for shape. Place the next square knots slightly offset below the first row so the design widens or narrows in a soft V. This creates the boho silhouette without needing advanced patterns, and the middle starts to read as a deliberate motif instead of random knots.
    6. Balance the sides. Mirror the knot placement on the left and right so the hanging feels symmetrical, even if the fringe is uneven later. If one side is heavier, the wall hanging will pull visually to that side as soon as it is hung.
    7. Check the fall before you finish. Hold the dowel up and look at how the cords hang for a minute. The center pattern should be the main visual mass, with the side cords falling cleanly and no cord crossing another in a way that hides the shape.

    The biggest mistake at this stage is tying knots too tightly from the start. That gives a stiff rectangle with no movement, and the fringe has less room to soften the piece. A slightly looser hand can make the wall hanging feel handmade rather than rigid. The other common mistake is skipping the measuring tape and guessing cord length. That usually leaves one side longer than the other and forces awkward trimming later.

    If you want a cleaner beginner pattern, stop after two knot rows and finish well. A simple design with crisp spacing beats a crowded one with weak symmetry.

    Which knot sequence makes the piece look decorative?

    Sunlit wall with hanging macrame decorations

    A short sequence of lark’s head knots, square knots, and a final shaping row makes the piece look decorative instead of practice-only. That sequence gives you a firm top, a visible center pattern, and a controlled bottom edge without asking you to learn advanced knotwork.

    The lark’s head knot is the anchor. It locks each cord onto the dowel and creates the fringe foundation. Square knots are the main body because they hold shape clearly and show up well from a distance. If you want one section to stand out, repeat square knots in a band rather than scattering different knots randomly. A patterned band reads as design; random knot changes read as practice.

    A beginner-friendly layout often works best in three zones. The top zone is the row of attached cords, left plain so the dowel acts as a frame. The middle zone carries the square knots in a dense band. The lower zone opens back up so the fringe can hang freely. That three-part structure gives the eye a place to start, a place to pause, and a place to finish.

    Spacing matters as much as the knot itself. If you place square knots too far apart, the wall hanging looks unfinished and thin. If you pack them too tightly, the piece turns stiff and heavy. A small gap between knot rows lets the pattern breathe and keeps the silhouette soft, which suits boho style better than a rigid grid.

    This is where many generic tutorials go wrong: they throw in several knot types just to show variety. Variety is not the goal. For one wall hanging, consistency is what makes it look polished. Use enough repetition to create rhythm, then stop before the design becomes busy.

    If the pattern starts to feel crowded, remove one row rather than adding another. A smaller design with a clear center usually looks more expensive and more intentional on the wall.

    How do you choose the right cord and wood dowel?

    You choose the right cord and wood dowel by matching the cord thickness to the size of the hanging and the dowel to the weight of the finished piece. For a beginner project, a cotton macrame cord and a plain wooden dowel are a forgiving combination, but the exact feel depends on the look you want.

    Cord thickness changes the whole look. Thin cord produces delicate knots and finer fringe, but it is less forgiving if your tension varies. Thicker cord gives chunky knots and a more rustic look, yet it can crowd small patterns quickly. If you want a clean boho wall hanging for a first attempt, stay in the middle: thick enough to hold shape, thin enough to knot without strain.

    Cord construction matters too. Single-strand cord combs into a soft fringe more easily, while braided cord holds a tighter line and can look neater in the body. If the fringe is the star of the design, single-strand is the easier choice. If the knots are the star, braided cord can look tidier.

    The dowel should be straight, smooth, and long enough that the knot field does not touch the ends. A slightly thicker wooden dowel gives the hanging a sturdier top edge, but it should still fit the room and the scale of the wall. A dowel that is too short makes the hanging look cramped. A dowel that is too long can make the cord cluster look sparse in the middle.

    Color also changes the result. Natural beige cord gives the classic boho look most people expect. White reads lighter and cleaner. Darker cord can look dramatic, but it also shows uneven knot tension more quickly. For a first piece, a neutral tone hides small inconsistencies better than a sharp color contrast.

    The honest limitation: this project is not ideal if you want a perfectly rigid geometric design. Macrame has a soft, organic look by nature, and the cord will move. That is part of the appeal, but it means a beginner wall hanging looks best when you work with that softness instead of fighting it.

    If you want to compare materials for other home projects, the DIY wall art ideas hub is the better place to branch out after this one.

    How do you finish the fringe so it looks clean?

    You finish the fringe by trimming, combing, and shaping the ends so the bottom edge looks deliberate instead of ragged. The last 10 minutes matter as much as the knots, because fringe is what turns the piece from a knot sample into a finished boho macrame wall hanging.

    Start by hanging the piece or laying it flat and checking the bottom line. Then cut the fringe to a shape that suits the design: straight across, a soft V, or a gentle angle. A straight edge looks tidy and calm. A V shape adds movement and helps a center pattern stand out. Use the measuring tape to compare both sides before you cut, because one uneven snip can throw off the whole bottom edge.

    If the cord is single-strand cotton, comb the ends with your fingers or a fine-tooth comb until they separate into soft tassels. That creates the airy boho finish most people want. If the cord resists combing, do not force it into a fluffy fringe. A lightly twisted or naturally straight end can still look good, especially on a cleaner, more minimal piece.

    After combing, trim again. Loose fibers and stray strands make the edge look unfinished, so a second careful cut is normal. Work slowly and cut less than you think you need. You can always remove another 1/2 inch, but you cannot put it back.

    A clean finish also includes the top. Check that the cords on the dowel hang evenly and that the knots are centered before you declare it done. If the hanging tilts, adjust the cord placement now rather than after it is on the wall.

    The main drawback of fringe is maintenance. It catches dust more easily than a flat fabric piece, and it can tangle if it is shoved into storage. If you want low maintenance, keep the fringe shorter and the pattern simpler.

    Common mistakes that make a beginner piece look unfinished

    The most common mistakes are uneven tension, random knot spacing, and a rushed fringe trim. Each one costs the piece clarity, and each one is fixable if you catch it before hanging.

    Uneven tension makes one row puff out while another sinks back. That creates a wavy, accidental look. The cure is to slow down and tighten each knot to the same feel rather than the same force. If the knots keep shifting out of line, pause and consult a trusted macrame guide before continuing. Macrame does not reward hard pulling; it rewards repeatable pressure.

    Random spacing breaks the silhouette. If the knots are scattered without a plan, the piece reads like a sample board. Keep the knot band centered, and leave the side cords with a clear job: frame the center. That one decision gives the wall hanging structure.

    A rushed fringe trim can cut the design apart. If the fringe ends are hacked off in a straight line with no check from side to side, the piece often looks shorter on one edge. Use the measuring tape and cut in stages. A 1-inch mistake on one side is obvious once the hanging is on the wall.

    Another problem is overdecorating. Some beginners add beads, extra knot rows, and color changes because the plain version feels too simple. That usually weakens the result. A single pattern with good spacing looks more finished than three competing ideas fighting for attention.

    The right fix is restraint. One strong knot sequence, one shape, and one clean finish are enough for a first boho macrame wall hanging.

    Hang and adjust it so the shape reads right on the wall

    You hang and adjust it by centering the dowel, stepping back, and correcting the silhouette before you call it finished. The final look changes once the piece is vertical, so do not judge it only while it is flat on the table.

    Place the dowel on a wall hook or hanger that supports the full width without tipping. When it is up, the cords should fall freely and the center pattern should sit at eye level or slightly below, depending on the room. A hanging that sits too high can feel lost on the wall; one that sits too low can crowd furniture below it.

    Stand back 6 to 8 feet and look at the outline. This distance shows whether the piece reads as one design or just as cords and knots. If one side looks heavier, redistribute the fringe gently with your hands. If the center seems too narrow, loosen the outer cords a little. If the bottom edge looks uneven, trim in small passes rather than one large cut.

    Light matters too. Natural light shows the cord texture best, while harsh overhead light can flatten the pattern. Put the hanging where its shadows can work for it. Macrame depends on texture, and the right placement can make a simple knot sequence look more dimensional.

    This is also where honesty matters about fit. A small boho wall hanging can fill a narrow space above a chair or shelf, but it will not solve a large blank wall by itself. If the room needs a statement piece, scale up the pattern or plan a pair, not a single tiny hanging that disappears.

    What cord is best for macrame wall hangings?

    Soft cotton macrame cord is the best starting point for most wall hangings. It holds knots clearly, frays into a clean fringe, and gives the soft boho look people usually want. Braided cord is a reasonable choice if you want a tidier edge, but it is less forgiving for fringe. Synthetic cord can look slick and is harder to shape.

    Drafted with AI; not yet reviewed by a person.
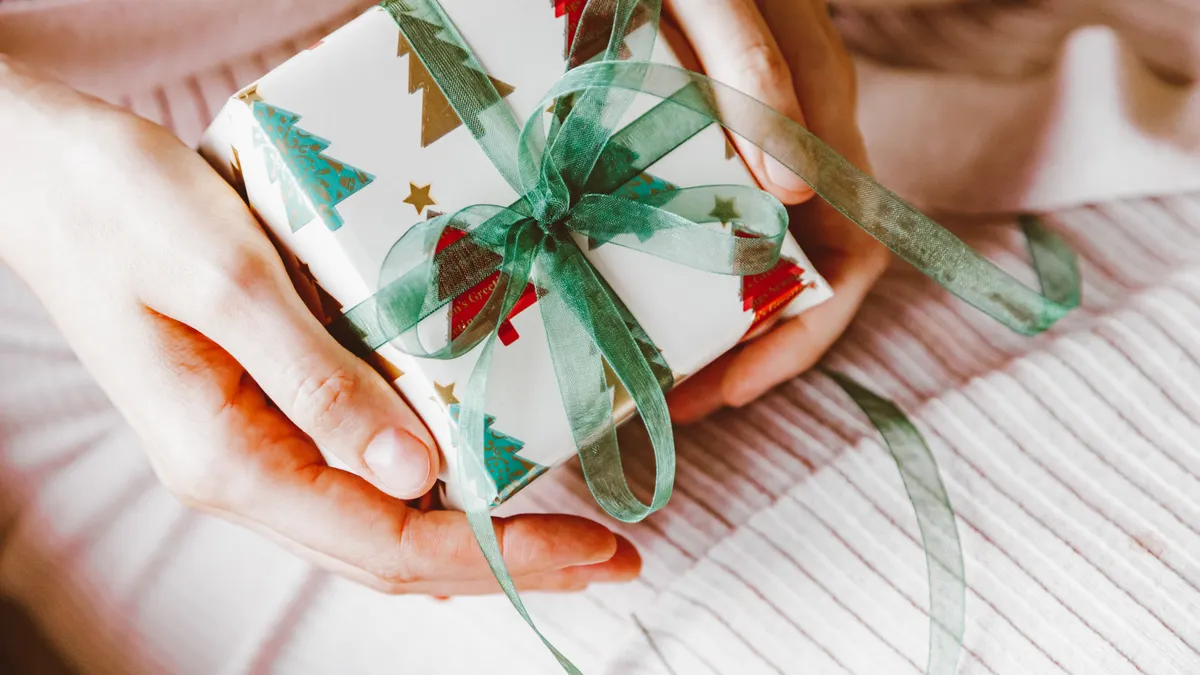
  • Home Decor Crafts: The Complete Guide

    Home Decor Crafts: The Complete Guide

    Last updated: October 23, 2026

    Quick Answer: For most rooms, 2 home decor crafts are enough to change the look of a space without cluttering it. In this guide, Home Decor Crafts — The Complete Guide means handmade objects or surface treatments that change how a room looks or functions. Home decor crafts work best when they solve a real problem: a blank wall, a shelf that looks unfinished, or a room that feels expensive to furnish but not expensive to live in. The right craft project is not the one with the most steps; it is the one that fits your room, your tools, and the amount of time you actually have.

    If the goal is to make a home feel finished without buying everything new, handmade decor can do that faster than a full redesign. The catch is that some projects look polished on social media and fall apart in a real room. In many cases, better results come from choosing crafts that are sturdy, scale correctly, and match the surface they’ll live on.

    Key Takeaways

    • Start with the room’s problem, not with the craft idea. A project should fill a visual gap or fix a functional annoyance.
    • Pick materials for the setting: humidity, sunlight, traffic, and weight matter more than trends.
    • The easiest-looking projects are not always the most useful, and frame-based, painted, and textile crafts usually last longer than fragile glue-heavy pieces.
    • Small changes — a tray, pillow cover, wall hanging, or lamp shade — often improve a room more than a large, awkward statement piece.
    • A good craft is judged by where it goes, how it holds up, and how much cleaning it will require later.

    What counts as a home decor craft?

    Person hanging framed art in a gallery wall

    A home decor craft is any handmade object or surface treatment that changes how a room looks or functions, though for safety-sensitive spaces you may want to consult a professional and check guidance from the U.S. Consumer Product Safety Commission and the National Fire Protection Association before placing items near heat, moisture, or heavy use: https://www.cpsc.gov/ and https://www.nfpa.org/education-and-research/home-fire-safety . That includes painted planters, woven wall hangings, macramé, decoupage boxes, fabric-covered storage, candle holders, painted frames, clay accents, and custom textiles like pillow covers or table runners.

    The useful dividing line is this: decor crafts should either add texture, control visual clutter, or bring a color story into the room. A project that only exists because it is cute usually ends up in a drawer. A project that solves a specific problem — an empty mantel, a dull shelf, a plain entry table — tends to stay in use.

    The most common mistake is to treat every room the same, though room conditions vary enough that it can help to consult a professional or at least check trusted safety guidance when you are unsure about moisture, heat, or placement. A bedroom needs softer materials and lower visual noise. A kitchen needs washable finishes and heat-safe placement. A bathroom needs moisture-resistant materials. A living room can support more decorative risk because it usually has the most visual distance and the least splash exposure.

    This is why the phrase “home decor crafts” covers more than glue guns and paint. A framed fabric panel, a clay bowl painted with mineral pigment, and a stitched pillow cover are all decor crafts if they are meant to shape the room. The craft becomes worth keeping when it does at least one of three jobs: it hides something ugly, fills empty space, or adds a material the room is missing.

    For a dependable starting point, home decor crafts should be chosen like accessories, not like furniture. They need to fit the room’s scale. A 4-inch handmade object on a large console can disappear. A 36-inch wall piece made from lightweight wood can look intentional and calm. The size, not the effort, decides whether the piece reads as polished.

    For room safety and surface care, the U.S. Consumer Product Safety Commission is a useful reference point for household hazards and placement concerns: https://www.cpsc.gov/ . For fire-safe handling around candles, lamps, and fabrics, the National Fire Protection Association’s home guidance is also worth checking: https://www.nfpa.org/education-and-research/home-fire-safety .

    Which home decor craft style fits your space?

    The best craft style is usually the one that matches the room’s wear level, not the one that looks most impressive on video. Painted and framed crafts win for most beginners; textile crafts win for softness and sound control; sculptural and mixed-media pieces win when a room needs a focal point.

    A practical way to choose is by category:

    • Painted crafts: best for frames, trays, flower pots, mirrors, and small furniture refreshes.
    • Textile crafts: best for pillow covers, runners, curtains, wall hangings, and basket liners.
    • Paper and decoupage crafts: best for covered boxes, lampshades, journal displays, and seasonal accents.
    • Clay and air-dry crafts: best for small bowls, charms, knobs, and tabletop accents.
    • Wood-based crafts: best for shelves, signs, beads, simple stands, and wall grids.
    • Natural-material crafts: best for wreaths, garlands, dried florals, and rustic textures.

    The strongest choice for most homes is painted or textile decor, because those projects survive daily life better than delicate assemblies. A pillow cover can be removed and washed. A painted tray can be wiped down. A wall hanging made from fiber or felt can live in a hallway without constant handling. A fragile paper craft near a kitchen sink is a bad bet.

    The trade-off is that simple crafts can look ordinary if the material choice is weak. Cheap felt, thin ribbon, glossy paint on the wrong surface, or lumpy glue lines can make a project look unfinished. That is why the material matters more than the project category. Cotton canvas, linen, raw wood, ceramic, and matte-finish paint usually read as calmer and more expensive than shiny plastic craft supplies.

    The other point many generic guides miss: the room itself sets the rules. If a room already has a lot of pattern, choose solid or low-detail crafts. If the room is mostly neutral, a textured object like a woven piece or carved wood works better than another beige object. If the room has very little natural light, avoid dark crafts that absorb more visual energy than they give back.

    For a beginner who wants a lower-risk path, textile and painted crafts are a good place to start. For a person who wants a more sculptural look and is comfortable with mess, clay and wood projects can be stronger. For a child’s room or a rental, removable and reversible projects are usually the smarter choice.

    The home decor crafts that actually hold up

    Wooden wall shelf with plants and decor

    The crafts that last are usually the ones with fewer failure points. A project built from a solid base, a stable finish, and washable or replaceable parts beats one that depends on stacked embellishments and glue alone.

    Painted trays, frames, and small furniture wins for utility

    Painted pieces are the most practical decor craft because paint changes a room without forcing a structural redesign. A tray, frame, stool, or side table can be transformed with one evening of work and a finish that fits the room’s palette. Satin and matte finishes usually look more controlled than high gloss in living spaces.

    The weakness is surface prep. If the object is slick, dusty, or greasy, the finish can chip early. That means sanding, priming, and choosing the right paint matter more than the color itself. A rushed paint job on a high-touch object becomes a maintenance issue fast. These projects are best for people who can tolerate prep and drying time, and who want visible impact from a low-cost material set.

    The right user is someone who needs a plain item to blend into a room or wants a standard object to look custom. The wrong user is someone who wants instant results and no dry time. Painted decor is not ideal for humid zones without the correct sealant, and it is a poor fit for pieces that will be scrubbed often unless the coating system is designed for that use.

    Textile crafts add softness, and softness is harder to fake

    Textile crafts win in rooms that feel hard, echoey, or sterile. Pillow covers, table runners, wall hangings, fabric bins, and slipcovers introduce softness, absorb sound, and make a room feel lived in. A cotton or linen cover can shift the look of a sofa without replacing it. A fabric wall piece can calm a blank wall without adding bulk.

    The main drawback is wear and cleaning. Light colors show stains. Loose weaves snag. Fringe collects dust. If the piece goes in a busy entry or near pets, a delicate fabric can become a chore. These crafts are best for bedrooms, reading corners, and living rooms where the surface won’t be rubbed every day.

    Textiles also help with scale. A big room often needs something larger than a knickknack, but not everything can be framed art. A 20-inch pillow or a 40-inch runner gives the eye a rest. That makes textile crafts one of the best answers for rooms that feel unfinished but not empty.

    Clay, wood, and natural materials give a room character

    Clay bowls, carved wood accents, dried branches, and woven pieces bring a more grounded look. Their value is tactile: they add visual texture that flat paint cannot mimic. A small clay vase, a wood riser, or a reed basket can make a shelf feel curated instead of random.

    The downside is fragility or weight. Air-dry clay can crack if made too thin. Untreated wood can warp. Dried natural materials shed and fade. These pieces are best used as accents, not as high-traffic items. They work especially well in entry tables, bookcases, and mantel displays where they can sit still and be admired from a distance.

    A generic article often overstates the “handmade” look and leaves out maintenance. Natural decor is not maintenance-free. Dust gathers quickly, and sunlight can bleach dried materials. Use them when the room needs texture, but not where cleaning is already difficult.

    How do I choose a home decor craft project that will not look cheap?

    Choose a project that uses one strong idea, one clean finish, and one correct scale. Most “cheap-looking” crafts fail because they try to do too much with too little structure.

    A reliable filter is this:

    1. Use one dominant material. One main material looks intentional; five random materials often look improvised.
    2. Repeat a room color. Even a handmade piece looks more expensive when it echoes an existing color in the rug, curtains, art, or pillow.
    3. Respect the object’s job. A tray should be flat and wipeable. A wall piece should be light enough to hang securely. A pillow should be soft enough to sit on.
    4. Avoid exposed glue and uneven edges. These are the fastest ways to make a craft look unfinished.
    5. Size it for the surface. A small craft on a big wall looks lost; an oversized craft on a narrow shelf looks awkward.

    A common mistake is using too many “decorative” add-ons. Beads, ribbon, fringe, glitter, stencils, metallic paint, and fake flowers can all work separately. Put them all together and the piece often looks busy instead of finished. The safest approach is restraint. One texture plus one accent is usually enough.

    The other issue is context. A nursery can handle more whimsy. A formal living room needs cleaner lines. A farmhouse kitchen may accept raw wood and muted florals. A modern room usually looks better with simple geometry and fewer color changes. This is where many craft guides fail: they present one project as universally good. It is not. The same piece can look charming in a cottage and cluttered in a minimalist apartment.

    If a craft project needs a lot of explanation after it is finished, it may not be a good decor object. Good decor reads well at a glance. The viewer should not need to know the process to understand the result.

    The honest side-by-side: which craft route wins for different rooms?

    The best route depends on the room’s purpose, the amount of wear, and how much visual change is needed. Painted and textile crafts win most often, but each material has a clear use case where it outperforms the others.

    Criteria Painted / Upcycled Decor Textile-Based Decor Winner for condition
    Best for quick visual change Changes color and finish fast on frames, trays, and furniture Changes softness and palette, but shape stays mostly the same Painted / Upcycled Decor for hard surfaces needing a reset
    Best for softness and warmth Can feel hard unless paired with other textures Creates visible softness with cotton, linen, wool, or felt Textile-Based Decor for bedrooms and living rooms
    Best for easy cleaning Wipeable if sealed correctly Often washable if the item is removable Painted / Upcycled Decor for trays and frames; textile for removable covers
    Best for small budgets Can reuse existing objects and avoid buying new bases Can use scrap fabric, but yardage adds up Painted / Upcycled Decor when an old object is already on hand
    Best for beginner mistakes Prep errors show quickly, but the concept is simple Seams, edges, and sizing can be tricky without sewing skills Painted / Upcycled Decor for absolute beginners
    Best for renters Portable objects can move with you Portable and reversible, especially covers and hanging textiles Textile-Based Decor for the least risk
    Best for high-traffic areas Good on shelves and tables if the finish is durable Can wear faster where hands, pets, or spills are frequent Painted / Upcycled Decor for entry tables and consoles
    Best for visual texture Depends on brush marks, distressing, or layered paint Naturally strong through weave, fringe, quilting, and stitch Textile-Based Decor for tactile rooms
    Best for large wall impact Can work if the object is sizable and light enough to hang Often easier to scale up with wall hangings or fabric panels Textile-Based Decor for large soft walls

    The clear winner for most homes is textile decor if the room needs softness, and painted decor if the room needs structure or a visual reset. The losing option in each case is the one that fights the room’s condition. A kitchen backsplash area does not want a delicate fabric piece. A bedroom wall that already has heavy curtains may not need another textile layer.

    This comparison also exposes the main generic-guide mistake: treating decor crafts as a single category. They are not. Some projects are surface treatments, some are room softeners, and some are storage in disguise.

    What are the best home decor crafts for beginners?

    The best beginner crafts are the ones that still look intentional if the cuts are imperfect or the edges are slightly uneven. That means framed pieces, painted containers, fabric covers, and simple hanging forms.

    The safest starter projects are:

    • Painted picture frames: low cost, easy to redo, and immediately visible.
    • Fabric pillow covers: useful, washable, and easy to swap seasonally.
    • Decorative trays: practical on a dresser, console, or coffee table.
    • Simple wall hangings: felt, yarn, or strip-fabric versions can fill a blank wall.
    • Planter wraps or painted pots: small scale, forgiving, and easy to match to a room.
    • Covered storage boxes: useful on shelves where clutter needs to disappear.

    These projects share one important trait: they solve an everyday problem. A pillow cover changes the mood of a sofa. A tray corrals loose items. A frame gives a room a personal note. That practical value is what keeps a beginner piece from becoming clutter.

    The trade-off is that beginner crafts are often easiest to make, not easiest to make well. Straight seams, even brush coverage, and neat edges still matter. A beginner should choose the simplest version of a project, not the most embellished one. A plain canvas pillow with a clean hem will usually look better than a highly decorated piece with weak construction.

    The one category I would skip at the start is overly delicate mixed-media decor. Tiny glued flowers, stacked embellishments, and fragile layered papers tend to fail first. They are difficult to dust and easy to crush. If the goal is a room that looks better, not a craft that looks labor-intensive, simpler wins.

    When should you skip a craft project and buy the finished item instead?

    Skip the craft when the object must be structurally sound, heat-safe, moisture-resistant, or perfectly sized. Some decor jobs are better left to manufactured items because the risk of failure is too high.

    Buy the finished version instead if the piece is:

    • Near heat or open flame: lampshades, candle surrounds, and fabric accents close to candles should follow safety guidance and proper product design.
    • Exposed to water often: bath accessories, sink-side trays, and shower-adjacent items need finishes that tolerate moisture.
    • Supposed to support weight: shelves, hanging planters, and wall-mounted organizers need reliable hardware.
    • Part of a matched set: if the room depends on exact uniformity, handmade variation may work against the look.
    • Meant for constant handling: drawer pulls, door accessories, and tabletop items that get moved daily may need manufactured durability.

    This is the most honest part of the guide: not every decor problem should be solved by crafting. A hand-painted object can be beautiful and still be the wrong tool. If a piece has to survive steam, grease, pulling, or repeated scrubbing, a store-bought version may be the better call.

    That does not make crafting less useful. It makes it more strategic. Use crafts where visual payoff matters more than engineering. Use finished products where performance matters more than personality.

    Which home decor crafts are worth making for a whole room?

    The best room-wide craft strategy is to make one large anchor piece and a few smaller supporting pieces, not a dozen unrelated trinkets. That is how a room starts to feel designed instead of decorated.

    A strong room plan looks like this:

    • One anchor: a wall hanging, oversized framed fabric, painted statement panel, or a large textile.
    • Two or three support pieces: a tray, pillow covers, a small vase, or a coordinated box.
    • One repeating material: wood, linen, black metal, ceramic, or matte paint.
    • One repeated color family: warm neutrals, muted greens, deep blues, or soft earth tones.

    This structure gives the room coherence. Without it, even good crafts can look scattered. The biggest mistake is making each item independently interesting. A room filled with clever objects is not the same as a room with a visual system.

    If the goal is a living room, start with a textile anchor and add only a few hard-surface pieces. If the goal is an entryway, use a tray, mirror, and one wall accent. If the goal is a bedroom, keep the palette softer and the material changes smaller. If the goal is a kitchen nook, choose wipeable pieces and avoid anything that traps grease or dust.

    The honest trade-off is time. A coordinated room takes longer to plan than a single project. But that planning is what makes the crafts feel elevated. A one-off object can be charming. A group of objects that share size, color, and material reads as a finished room.

    The verdict: which home decor craft approach should you choose?

    Choose painted or upcycled decor if you want the fastest visual reset, already have a base object, and need something wipeable for a console, tray, or frame. Choose textile-based decor if the room feels cold, noisy, or unfinished and you want softness, washability, and easy swapping. Neither if the item must survive heavy moisture, heat, or constant handling, because a craft is the wrong tool for those jobs.

    The clearest winner for most readers is textile decor for lived-in rooms and painted decor for hard-surface makeovers. That split is practical, not trendy. It matches how rooms actually function.

    If the goal is to make a home feel more personal without turning it into a hobby workshop, start with one useful object and one soft object. A painted tray plus a pillow cover will usually do more for a room than three decorative objects with no clear purpose.

    Drafted with AI; not yet reviewed by a person.

  • Easy Paper Craft Ideas for Kids at Home

    Easy Paper Craft Ideas for Kids at Home

    Last updated: October 22, 2026

    Quick answer: 7 easy paper craft ideas for kids at home are included below, and each one uses common supplies, a short setup, and a finishable step list. Easy paper craft ideas for kids at home work best with paper, scissors, a glue stick, and markers already on hand.

    Easy paper craft ideas for kids at home start with one simple rule: use paper crafts for kids that need little setup, little cleanup, and materials already in the drawer. A sheet of construction paper, a stack of printer paper, scissors, a glue stick, and markers are enough for most of the projects below. For paper safety guidance, the U.S. Consumer Product Safety Commission recommends age-appropriate materials and supervision for young children. https://www.cpsc.gov/Safety-Education/Safety-Education-Centers/Child-Product-Safety

    What makes a paper craft easy enough for home?

    An easy paper craft is one a child can finish in 10 to 20 minutes with one main fold, one main cut, or one simple glue step. That matters because the craft should feel doable on a kitchen table, not like a school project that needs a ruler, specialty paper, or a drying rack.

    A practical home paper craft usually has three traits. It uses common supplies such as construction paper, printer paper, crayons or markers, scissors, and a glue stick. It forgives uneven cutting and crooked folds. It still looks finished even if the child is young or distracted halfway through.

    That makes some crafts a poor fit. Tiny paper weaving, layered collage scenes, and intricate cutouts are frustrating for children who are still learning to control scissors. They also create more scraps, more glue smears, and more adult fixing. For this page, the goal is not perfection. The goal is a finished object a child can hold up with pride.

    Age matters too. Four- and five-year-olds usually do better with tearing, folding, and sticking large shapes. Children around 6 to 8 can handle simple cutting lines and basic templates. Older kids can add details like faces, patterns, and labels without changing the core project. That range is why the ideas below stay low-prep and low-mess rather than highly decorative.

    If a craft needs a hot glue gun, glitter, paint, or a long drying time, it no longer belongs in the “easy at home” bucket. It may still be a good craft, but it is not the kind a parent can pull out on a weekday afternoon.

    Easy paper craft ideas for kids at home

    Kids and adult doing paper cutting and gluing

    These paper craft ideas for kids at home are a safe place to start because each one uses a short supply list and one clear action. Pick one project, set out the materials before the child sits down, and keep the instructions to three steps or fewer.

    1) Paper animals from circles and rectangles

    Cut a few circles and rectangles from construction paper, then turn them into animals with a glue stick and markers. A paper bear needs one large circle for the head, one bigger circle for the body, two small circles for ears, and a rectangle for the legs. A paper fish can be a single oval with a triangle tail.

    This works well because children do not need exact measurements. If the circles are lopsided, the animal still reads as an animal. Markers add eyes, whiskers, spots, stripes, and claws without extra supplies. For younger children, pre-cut the shapes. For older children, let them cut the shapes themselves and decide what animal to make.

    The trade-off is that the craft can look plain if the child stops after gluing the shapes together. Add one detail that changes the whole page: a nose, a tail, or a small background like grass or water.

    2) Folded paper fans

    Fold a strip of printer paper back and forth like an accordion, then tape or glue one end to hold it together. A strip about 2 to 3 inches wide makes a small fan that opens neatly in little hands. Construction paper works too, but printer paper folds more easily.

    This is a strong first folding craft because the result appears fast. A child can decorate the strip before folding with crayons, dots, stripes, or hand-drawn patterns. When opened, the folds make the design look more complex than it is.

    The downside is that thin paper can tear if a child folds too hard. Show gentle creases first, then press each fold flat with a palm. If the fan keeps springing open, add a piece of tape at the handle instead of more glue.

    3) Handprint trees and flowers

    Trace a hand on construction paper, cut it out, and use the fingers as branches, petals, or feathers. A brown handprint becomes a tree trunk and canopy when turned upside down. A green handprint can become a flower top with a paper stem.

    This craft is useful because it mixes drawing, cutting, and gluing without complex shapes. It also gives younger children something personal to make. The hand outline creates a shape that feels special even when the child uses only one color.

    The common mistake is making the handprint too small to decorate. Use a full sheet of paper if possible, especially for children under 7. That leaves room for markers, blossoms, birds, or grass.

    4) Paper chains from scrap strips

    Cut 1-inch-wide strips of construction paper, loop one strip, glue or tape the ends, then thread the next strip through the first loop. Repeat until the chain is as long as the child wants. Printer paper works in a pinch, but construction paper makes sturdier links.

    Paper chains are ideal for low-energy afternoons because the child repeats one move. The pattern becomes satisfying fast, and the chain can be made in 10 minutes or stretched into a longer project. It also uses leftovers from other crafts.

    The main drawback is cleanup from many small strips. Put a tray or baking sheet under the work area so scraps stay contained. If the child loses interest quickly, start with just 6 to 8 links instead of a long chain.

    5) Puppets with paper bags or folded paper

    Make a face on a folded paper rectangle or the flat side of a lunch-sized paper bag, then add paper ears, hair, and arms. A glue stick and markers are enough. The child can turn the puppet into an animal, a character, or a made-up creature.

    This craft gives kids something to play with after the making part ends. That matters because useful home crafts are not only pretty; they also support a second round of pretend play. Simple speech bubbles cut from printer paper can add another layer without making the project harder.

    Avoid too many glued layers on the mouth area. Thick glue can make the paper bend awkwardly and can hide the moving part of the puppet. Keep the face flat and leave the center fold or opening clear.

    6) Paper crowns and headbands

    Cut a long strip of construction paper to fit around the child’s head, then staple or tape the ends after decorating it with stars, spots, lines, or paper jewels. A strip about 2 inches tall is enough for most headbands.

    This is a strong choice when a child wants something wearable. The result feels special with almost no materials. It also gives room for personal choices, which keeps older kids engaged. Add one paper shape at a time rather than piling on decoration.

    The drawback is fit. If the strip is too tight, the crown becomes uncomfortable. If it is too loose, it slips. Wrap the strip around the child’s head before decorating, then overlap the ends and mark the size first.

    7) Simple paper masks

    Draw a mask shape on construction paper, cut out eye holes, and decorate it with markers and paper scraps. A tongue depressor, paper straw, or folded strip of paper can act as a handle if you want a handheld mask instead of a head-worn one.

    Masks are useful for older preschoolers and early elementary kids because the project gives them a clear identity to build around. A fox mask needs orange paper, pointy ears, and a black nose. A superhero mask may need only a bold color and sharp eye shapes.

    The biggest mistake is cutting the eye holes too close together or too small. Start with larger holes and adjust only if needed. A child can always add decoration around the eyes, but a cramped mask cannot be fixed easily.

    Which supplies should I set out first?

    Set out five basics first: construction paper, printer paper, scissors, a glue stick, and markers. Those items cover most low-prep paper crafts without sending you to buy specialty supplies. Tape is useful too, but it is optional.

    Keep the setup simple. A flat table, a trash bowl, and one pencil for tracing are enough for most projects. If you want to make the session easier, pre-cut a few shapes or strips before the child starts. That saves time and cuts down on frustration, especially for younger children or children still learning scissor control.

    Use paper that matches the job. Construction paper is better for sturdy shapes, crowns, chains, and puppets. Printer paper is better for folding, tracing, and drawing templates. Mixing the two can help: printer paper for practice, construction paper for the final version.

    Choose scissors by hand size. Child-safe scissors with blunt tips are easier for small hands and are the safer choice for preschool and early elementary children. Adult scissors are fine for the grown-up who is doing the pre-cutting. For official child-safety advice on tools and supervision, see the CPSC guidance above and the American Academy of Pediatrics’ HealthyChildren resources: https://www.healthychildren.org

    One honest limitation: paper alone cannot do everything. If a child wants a project that stands upright, glows, or has texture, paper will feel too flat. That is not a failure of the craft. It just means this category is best for simple, table-friendly activities rather than sculptural ones.

    If the aim is minimum mess, skip glitter, liquid glue, paint, and foam stickers. A glue stick usually keeps the page cleaner and dries faster than school glue. Markers are better than watery paints for most home paper projects because they do not need drying time.

    How do I make paper crafts less messy?

    Children cutting and arranging colored paper

    Paper crafts stay cleaner when the setup is controlled before the first cut. Put out only the materials needed for one project, keep a small scrap container on the table, and use a glue stick instead of liquid glue when possible. That alone cuts most of the mess.

    Start with a placemat, tray, or newspaper square under the work area. It gives scraps a boundary and makes cleanup easier in under 2 minutes. For children who scatter pieces, cut paper into larger shapes first so there are fewer tiny leftovers.

    Keep the glue rules simple. One swipe is usually enough for paper-to-paper bonding. More glue does not make the craft stronger; it just causes wrinkling and slippery fingers. If a child tends to overdo it, hand them the glue stick and keep liquid glue out of reach.

    Markers are the cleanest decoration tool for most projects. Crayons are fine too. Avoid wet paint unless the project truly needs it, because wet paint changes the whole cleanup problem. If you do use anything wet, plan for drying time and a separate surface.

    The most common mess mistake is giving a child too many options at once. Ten colors, extra paper scraps, stickers, and googly eyes sound fun, but they make the work area chaotic fast. Two or three colors are usually enough for a finished look.

    This is not the right activity if the child wants a highly detailed scene with glue, paint, and lots of layering in one sitting. For that kind of project, a different craft format makes more sense. Paper crafts work best when the child can finish without needing help every minute.

    What should I do when a paper craft starts to go wrong?

    When a paper craft goes wrong, simplify it instead of restarting. A crooked fold, a torn edge, or a badly cut circle usually does not ruin the project. It just means the design needs a smaller goal.

    If a fold keeps opening, press it flat again and secure it with a small piece of tape at the back. If the problem keeps happening, stop and check whether the paper is too thick for the fold or whether the child needs help holding the crease. If needed, consult a teacher, parent, or other trusted adult about a safer way to finish the step. If a cut shape is uneven, turn it into something else: a bird wing, a cloud, a monster ear, or a leaf. Paper is forgiving because many shapes can be repurposed.

    If the child gets frustrated, stop adding rules. Say what still works, then give one next step. “This circle is fine for a face” is more useful than “Try again.” A 5-minute reset can save the whole craft session.

    A practical way to keep momentum is to cap each project at one main outcome. For example, a paper animal only needs a body and face; details can wait. A crown only needs a band and a few decorations. That rule keeps the project from ballooning into something that feels like homework.

    The biggest mistake is expecting the finished craft to match a model exactly. Kids’ paper crafts are supposed to look homemade. If the goal is neat symmetry, a child often loses interest before the piece is done. If the goal is a recognizable shape with room for personal choices, the project works.

    For children under 6, the adult may need to do most of the cutting. That is not a shortcut around the craft; it is part of making it age-appropriate. The child still gets to choose colors, place features, and assemble the final piece.

    A simple 15-minute paper craft routine that works

    A 15-minute routine works best when the craft is pre-decided, the materials are limited, and the child knows the finish line. Choose one project, put out one sheet or one strip at a time, and end with one clear decoration step.

    1. Pick the project and set out only the needed supplies: for example, construction paper, scissors, glue stick, and markers.
    2. Pre-cut the hard parts if the child is under 7, such as circles for an animal or strips for a chain.
    3. Let the child assemble the base shape first, which gives the craft a fast early win.
    4. Add one decorating pass with markers or paper scraps, not five separate layers.
    5. Finish with a single check: eyes, ears, handles, or a headband fit.

    That routine is useful because it keeps the task small enough to finish in one sitting. It also works across ages. A 4-year-old can glue and color. An 8-year-old can cut and decorate. A child who wants more can always make a second version with a new color scheme.

    The drawback is that quick crafts are not always the most detailed. That is the point. Home paper crafts should feel easy to start and easy to stop.

    Paper craft comparisons and quick buying notes

    Project Best paper Time Typical cost Best for
    Paper animals Construction paper 10-15 min Low Shapes and pretend play
    Folded paper fans Printer paper 5-10 min Very low Folding practice
    Handprint trees and flowers Construction paper 10-15 min Low Younger kids
    Paper chains Construction paper 10-15 min Very low Repetition and decoration
    Puppets Paper bag or construction paper 10-20 min Low Play after making
    Crowns and headbands Construction paper 10-15 min Low Wearable crafts
    Simple paper masks Construction paper 10-15 min Low Costume play

    Construction paper is usually the better choice for the sturdier projects in this list, while printer paper is better when folding matters more than strength. That is why the supply list stays short: most easy paper craft ideas for kids at home do not need specialty materials.

    Key Takeaways

    • The easiest paper crafts for kids use paper, scissors, glue stick, and markers.
    • Simple shapes, folds, and strips beat detailed templates for home use.
    • Younger children do best with pre-cut pieces and larger shapes.
    • Construction paper is sturdier; printer paper is better for folding and tracing.
    • Less glue, fewer supplies, and one clear goal keep cleanup manageable.

    What paper crafts are easiest for kids?

    The easiest paper crafts for kids are ones built around one repeated action, such as folding, cutting circles, or gluing strips into a chain. Easy paper craft ideas for kids at home work best when the child can finish the project without needing constant help.

    Drafted with AI; not yet reviewed by a person.
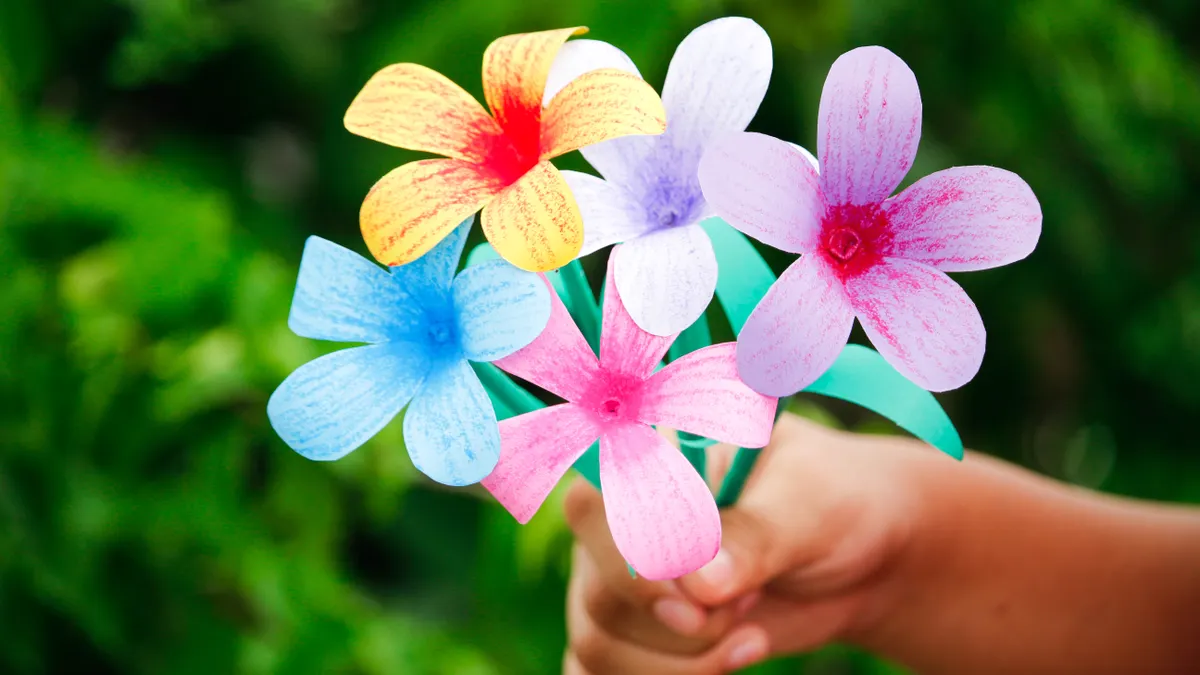
  • Easy Halloween Paper Crafts for Home Decor

    Easy Halloween Paper Crafts for Home Decor

    Last updated: October 22, 2026

    Quick Answer: three to five paper decorations, repeated across one window, mantel, or wall, are usually enough to make a room feel seasonal without clutter. Easy Halloween Paper Crafts for Home Decor use black paper, orange paper, scissors, glue, and string to turn a room into a seasonal space for a few weeks, then fold away cleanly afterward. If the goal is indoor decor that looks festive and stores flat, paper is a practical option.

    Key takeaways

    • Paper decorations work best when you keep the shapes large, the cuts simple, and the color palette tight.
    • A few repeatable forms — bats, pumpkins, garlands, and window silhouettes — cover most home-decor needs.
    • Black paper gives strong contrast, while orange paper keeps the look unmistakably Halloween.
    • Glue dots, tape, and string make wall and window displays easier than heavier adhesives.
    • These crafts suit renters, small apartments, and anyone who wants budget Halloween decor without storing oversized items.
    • They are less useful if the room already has very dark walls or if you want decorations that survive damp porches or strong outdoor wind.

    Build a simple paper-decor kit before you cut anything

    Hand arranging paper bats in a circle

    A small kit keeps these crafts cheap, fast, and repeatable. For most homes, a stack of black paper, orange paper, white paper, scissors, glue, string, a pencil, and tape is enough to make several displays without buying specialty supplies. A 12-by-12-inch scrapbook pack works well for larger shapes, while standard letter paper suits smaller cutouts and layered pieces.

    Start with two colors, not five. Black and orange do the heavy lifting for Halloween. White can help with eyes, teeth, or moon shapes, but too many extra colors make the room look like a classroom project instead of decor. If the aim is a clean, adult look, limit the palette to three colors and repeat the same shapes across a room.

    The other choice is finish. Construction paper is cheap and easy to cut, but its matte surface can wrinkle if you use too much glue. Cardstock holds shape better on window displays and hanging pieces, but it takes a sharper scissor blade and more hand pressure. That trade-off matters if you are making 15 or more bats or pumpkins; thicker paper looks neater, but it slows assembly.

    A ruler helps, even for casual projects. A 6-inch strip cut from a sheet can become a garland link, a pumpkin stem, or the body of a bat. Consistent sizes make the whole display feel intentional. That matters more than adding detail. A set of 10 matching shapes usually looks better than 20 uneven ones.

    How do you make Halloween decorations from paper?

    You make Halloween decorations from paper by cutting repeatable shapes, arranging them in groups of 3 to 12, and fastening them with tape, glue, or string. One useful approach is to choose one shape per area of the room and repeat it instead of making a different craft for every surface.

    Here is a simple process that works for most indoor setups:

    1. Pick one spot first, such as a mantel, window, mirror, or bookshelf, so the crafts fit the surface instead of floating in isolation.
    2. Trace or sketch one shape on paper, using a pencil and a 4- to 6-inch template if you want the pieces to match.
    3. Cut 6 to 10 copies of that shape before you start decorating, because batches look cleaner than one-off pieces.
    4. Lay the pieces on the surface before attaching them, which helps you see spacing and keeps the display from feeling crowded.
    5. Attach the shapes with removable tape, small glue dots, or a thin line of glue, depending on whether the surface is glass, painted wall, or cardboard.
    6. Add a second layer only if needed, such as eyes on bats or stems on pumpkins, so the craft reads clearly from across the room.
    7. Step back 6 to 8 feet and check whether the shapes still read as Halloween decor rather than scattered cut paper.

    The big mistake here is over-detailing. Tiny fangs, nested layers, and intricate cutwork look clever at the table, then disappear once they are across the room. A silhouette with a sharp outline reads better. Keep openings large enough that the shape survives when taped to glass or hung from string.

    Another mistake is mixing paper weights in one display without planning for it. Lightweight paper curls at the edges, especially on windows that get afternoon sun. Heavier cardstock stays flatter but needs stronger tape or more glue. Use one weight for a whole garland or one window panel so the finished piece hangs evenly.

    Easy Halloween paper bats for walls and windows

    Scattered paper bat cutouts on orange

    Paper bats are the easiest way to fill a wall or window with Halloween shape and movement. A few bat silhouettes in different sizes create a lot of visual impact with very little cutting.

    Start with black paper and make a simple bat template about 3 to 5 inches wide for small displays or 6 to 8 inches wide for a focal wall. Fold the paper in half before cutting if you want symmetrical wings. One side should hold the body and wing shape; the other opens into a clean mirror image. This saves time and keeps the edges even.

    For a standard window, 7 to 9 bats usually looks balanced without feeling crowded. Place the smallest bats near the top corner, then let larger ones drift outward or downward. That staggered layout suggests motion, which is why bats read better than a straight row. If the window is narrow, use only 3 to 5 larger bats and keep the spacing loose.

    For glass, clear tape works if you roll it into tiny loops behind the paper. Removable adhesive dots are better for painted walls because they hide behind the bat body. String works if you want bats to hang from a curtain rod or shelf lip; cut a 12- to 18-inch length for each cluster and stagger the heights by 2 or 3 inches.

    Keep the bat faces minimal. Two small white eye dots, or no face at all, is enough. The shape itself does the work. If you add too many teeth or eyes, the display stops looking graphic and starts looking busy.

    These bats are not ideal for a room that already has a lot of black furniture or dark walls. The contrast can flatten out, and the shapes lose their punch. In that case, make the bats larger or switch to orange accents around them.

    Paper pumpkins that look good on a shelf or mantel

    Paper pumpkins are a strong choice when the room needs a softer Halloween look than bats or skull silhouettes. They work on mantels, shelves, side tables, and entry consoles because they add roundness and color without taking up much depth.

    The simplest version uses orange paper strips. Cut 6 to 8 strips, each about 1 inch wide and 8 to 10 inches long. Curve the strips into loops, glue or tape the ends together at one point, and fan them around a small paper circle or folded ring. Add a short green or brown paper stem on top. The result is a rounded pumpkin shape that stands up better than a flat cutout.

    A layered flat pumpkin is even easier. Cut one orange circle or oval, then add a darker orange or brown stem and a few vertical crease lines with a pencil. This version is useful when shelf depth is tight, because it can lean against books or a frame. If you want more dimension, cut a second, slightly smaller orange shape and glue it behind the first at a slight angle.

    For a mantel, group pumpkins in odd numbers. Three tends to look more natural than two, and five works well if you have room for a 24-inch span or wider. Mix one large pumpkin with two smaller ones so the display has height variation. A single flat pumpkin often disappears beside candles, frames, or books; a trio reads as a deliberate arrangement.

    The trade-off with paper pumpkins is sturdiness. They look best indoors and away from direct fan air or open windows. If you want the effect to last, use cardstock rather than thin paper for the strip loops. Thin paper is easier to bend, but it softens and caves in faster. That matters on a shelf that gets handled often.

    Window decorations that turn daylight into part of the craft

    Window decorations are the most efficient use of Halloween paper crafts because daylight does half the work for you. A window can hold silhouettes, garlands, and layered shapes without needing extra room on the floor or furniture.

    The easiest approach is a two-layer window scene. Put black shapes on the glass and use orange shapes just inside the room to create contrast. For example, a row of bats on the glass and a strip of orange paper pumpkins on the sill creates depth without clutter. If the window faces a street, silhouettes will read clearly from outside and inside.

    For a clean layout, treat the window like a rectangle with margins. Leave 2 to 4 inches of open space around the edges so the composition does not look jammed into the frame. If you are unsure about a tall or awkward window, consider checking the layout with a decorator or installer before taping anything in place. A centered design works well for smaller windows, while tall windows can handle a vertical cascade of bats or a hanging paper chain. If the window has blinds, hang pieces from the top rail with string and let them fall in front of the slats.

    Paper chain garlands still work here, but keep the links wide enough to show shape from a distance. A 1-inch-wide strip can look flimsy; a 1.5- to 2-inch strip reads better across a room. Alternate black and orange links for a classic Halloween strip, or use all black if the room already has plenty of color.

    The main limitation is glare. Strong daylight can flatten details, especially on glossy paper. Matte paper and thicker cardstock help, but they do not eliminate reflection. If the window gets harsh sun, use bolder shapes rather than delicate cutwork. The simpler the silhouette, the better it survives changing light.

    Budget Halloween decor ideas that fill a room fast

    Budget Halloween decor works best when one paper shape repeats in several places instead of when every surface gets a different craft. That approach stretches one pack of paper across a whole room and gives the decor a consistent look.

    Use the same bat shape on a mirror, a hallway wall, and a window. Repeat the same pumpkin form on a shelf, a side table, and a frame corner. Repeat shape is cheaper than variety because you spend less time designing and less time sorting scraps. If you are using 8.5-by-11-inch sheets, one sheet can often yield multiple small cutouts if the template is compact.

    Paper string garlands are especially useful for budget decor. Cut a set of simple shapes, punch two tiny holes near the top if needed, and thread them onto string with small knots or tape loops behind each piece. Hang the finished garland over a curtain rod, across a bookshelf, or along the edge of a mirror. A garland gives you horizontal movement for very little material.

    If the room needs volume, use clusters rather than single decorations. Three bats together have more presence than one larger bat alone. Five pumpkins on a mantel look fuller than one oversized centerpiece. Clustering also hides small cut imperfections, which is useful when the scissors are not razor-sharp.

    This style is not for anyone who wants heirloom decor or weatherproof pieces. Paper is light, easy, and cheap, but it dents, curls, and tears. That is the point for seasonal indoor decorating. The goal is a fast room update, not a long-term prop collection.

    For readers who also like reusable seasonal paper projects, the same cut-and-assemble approach carries over well to the hub on christmas ornament craft ideas for adults.

    Finish the display so it looks intentional, not homemade in the wrong way

    A finished Halloween paper display looks intentional when the edges are clean, the spacing is even, and the colors repeat at least three times. The last 10 minutes matter as much as the cutting.

    First, trim stray tabs and overlong hanging string. A 2-inch tail of thread can make a neat garland look unfinished. Next, check balance from the doorway, not from arm’s length. The room should read as decorated from 6 to 10 feet away, because that is how most people will see it. If a corner feels empty, add one large shape rather than several tiny ones.

    Then unify the finish. Use the same tape color where possible, keep the same paper finish in each zone, and repeat one material in more than one place. A black bat on the wall, a black bat in the window, and a black bat in the mirror link the room together. Without that repetition, the decor starts to feel random.

    Do not overload every surface. A mantel, one window, and one mirror are usually enough for a room-sized setup. More than that can make the space feel cluttered, especially if the paper shapes are all the same scale. Leaving one or two plain surfaces gives the decorations room to breathe.

    The simplicity of paper decor is also its limit: it works because the shapes are clear and the color story is tight. Once those pieces are in place, stop adding more. That is what keeps Halloween paper crafts easy, cheap, and worth leaving up for the season.

    What are easy halloween paper crafts?

    Easy Halloween paper crafts are simple cutout decorations made from paper, scissors, glue, and string. The easiest versions are bats, pumpkins, garlands, and window silhouettes because they rely on bold shapes rather than detailed folding. They work well indoors, cost little to make, and are simple to store flat after the season ends.

    How do you make halloween decorations from paper?

    You make Halloween decorations from paper by choosing one shape, cutting several copies, and attaching them to a wall, window, shelf, or mirror. A basic bat or pumpkin shape usually starts with black paper or orange paper, then uses tape, glue, or string to place the pieces in a group that reads clearly from a few feet away.

    What can i decorate with paper for halloween?

    You can decorate windows, walls, mirrors, mantels, shelves, and door frames with paper for Halloween. Paper works best on smooth indoor surfaces where lightweight cutouts can be taped, glued, or hung. It is especially useful for renters and small spaces because it creates seasonal decor without heavy fixtures or bulky storage afterward.

    Drafted with AI; not yet reviewed by a person.